Showing posts with label Blogger Recipes. Show all posts

Monday, May 6, 2024

MONDAY MORNING RECIPE POST - CHICKEN FRIED RICE - SERVES 4


I found today's recipe at Kitchen Sanctuary hosted by Nicky. The recipe was excellent and we will be making it again. The original recipe came from this website. Always encourage going to their blog to see not only notes, tips and photos, but the measurements are metric. I have only used Imperial.


Chicken Fried Rice - serves 4 - calories per portion approximately 477


2 tbsp vegetable oil (we used avocado oil)

1 onion peeled and diced

1 red bell pepper deseeded and finely chopped 

2 cloves garlic peeled and minced

2/3 cup frozen peas

2 cups cooked shredded/sliced chicken

½ tbsp sesame oil

4 cups cooked and cooled long-grain rice

2 eggs

2 tbsp dark soy sauce (we used low sodium soy sauce)

¼ tsp salt

Juice of 1/2 a lemon

3 or 4 spring onions, chopped (for garnish)


Heat 1 tbsp of the oil in a large wok on medium heat. Add the onion and cook, stirring regularly for 5 minutes until the onion starts to turn soft and translucent.

Add remaining vegetable oil, chopped red bell pepper, garlic, and peas. Cook for a further 2 minutes, stirring regularly.

Now add chicken and sesame oil. Stir together, then add in the rice and turn up the heat to high.

Use a spatula to mix everything together. This also prevent the rice from sticking to the bottom of the pan.  Stir until all reheated for about 5 minutes.

Push the rice over to the side of the pan and crack two eggs in the space. Add a splash of soy sauce to the eggs.

Making sure the part of the wok with the eggs in is over the heat, fry the eggs, giving a mix with the spatula until the egg starts to cook and look scrambled, but is still a little runny.

At this time mix the egg into the rice.

Pour in the remaining soy sauce, sprinkle on the salt and mix it all together.

Add the lemon juice, stir and taste. Add a little more lemon juice if required.

Divide between 4 bowls. Top with spring onions. 


Nikki's notes state that this can be made ahead. She suggests spreading the cooked rice out in a large dish so that it will cool quickly. Then cover and refrigerate for up to a day. 

Important to note do not leave at room temperature as bacteria can grow on cooked rice very quickly.

This being the case, refrigerate very quickly.

Don't store for more than 24 hours in the fridge and thoroughly reheat it. 

Reheat in a wok, over a medium-high heat, moving it around the pan with a spatula, until piping hot throughout. 

You may need to add an extra splash of oil, as the rice will have absorbed the oil whilst in the fridge.

She also says this can be frozen.

Again, cook the rice, then spread it out in a large dish (so it will cool quickly) cover and freeze.

As before, don't leave cooked rice out at room temperature. Bacteria can grow on cooked rice very quickly, so it's important to freeze it as quickly as possible and defrost in the refrigerator overnight (don't store in fridge for more than 24 hours). Thoroughly reheat it in a wok, over a medium-high heat, moving it around the pan with a spatula, until piping hot throughout. You will need to add an extra splash of oil, as the rice will have absorbed the oil upon storing.

Add an extra squeeze of lemon juice and some fresh chopped spring onions on top before serving.

If you have any doubts, please read Nikki's notes at her website.


Changes made:

We added a whole bag of pre-sliced cabbage bought from the supermarket, the type you usually make coleslaw with. This was put into the pan after cooking the onion, along with the other veggies. There was red cabbage in the mix, and I only mention this because I read recently that there are more nutrients which you can read about here. The bag of coleslaw cabbage wasn't bought for this reason, it was the only one available. I seem to be reading more articles on nutrition and health these days.

We used avocado oil instead of the vegetable.

Gregg thought - for our own taste - this dish would benefit from either Thai basil or chopped Cilantro. We like both and I think he has a point.

Gregg did most of the cooking, so he also added 2 tablespoons of Chili Garlic Paste, 1 tablespoon of oyster sauce, 2 tablespoons of peanut butter and 4 tablespoons of low sodium soy sauce, stirring into the ingredients at the end of the recipe. He is an adventurer, more so than I am, and it all turned out great.

We used low sodium soy sauce.

After adding the sliced green onion for a garnish, I also put a tablespoon of chili crisp on top of mine, drizzling it all over my portion.  

Gregg added a tablespoon of sour cream to his.

From the chili garlic paste to the sour cream, you can obviously leave all of this off if you prefer.

I thought sliced mushrooms would be a nice addition.

I also must remember not to cut the cooked chicken into such teeny pieces. It just about disappeared into the mix never to be found again!  I dislike chunks and suggested to dear other half that I would do the task this time. Afterwards, when we sat down to eat, he said where was the chicken (it was an already cooked rotisserie from the store the day before - we already had one meal and there was a lot of it left). I did go a little overboard and promised to do better next time. Yes I am smiling. My brain was racing that day and that knife was flying. The knife was giving the cutting board a real workout.

There were two meals left for the next day, and it tasted even better. 

I tend to make additions as I think of them, so check back after a couple of days if you are interested in this recipe. 

That's it! If you have any questions let me know in the comment section and I will do my best to answer.


Monday, July 10, 2023

MONDAY RECIPE POST - SESAME SOY SALMON WITH GINGER HONEY GLAZE


My salmon recipe today comes from "The Iron You" hosted by Mike.  You can see the original here.  He offers alternatives in the ingredient section which you might want to take a note of.  The ingredients below are what I used.

Sesame-Soy Salmon with Ginger Honey Glaze
Serves 4

For the salmon:

1-1/2 lbs. (or four 6 oz. pieces) salmon, you can take the skin off if you prefer
4 tablespoons olive oil
2 tablespoons toasted sesame oil
2 tablespoons rice wine vinegar
2 tablespoons brown sugar
2 tablespoons soy sauce 
2 garlic cloves, minced
1 tablespoon freshly grated ginger
2 tablespoons toasted sesame seeds

For the Ginger Honey Glaze

4 tablespoons mild-tasting honey
1 tablespoon toasted sesame oil
1 teaspoon low-sodium soy sauce
1/2 teaspoon freshly grated ginger
1/2 teaspoon toasted sesame seeds

For garnish (optional):

Toasted sesame seeds 
Thinly sliced green onions


In a bowl combine the olive oil, sesame oil, soy sauce, garlic, ginger, vinegar and brown sugar.  Using a whisk mix thoroughly until well blended.

In a shallow covered container or in a large Ziploc bag, place the salmon inside and pour the marinade over it.  Cover or seal and marinate in the refrigerator for 30 minutes.

While the salmon is marinating combine all the glaze ingredients in a small bowl and set aside.

Place the rack in the middle of the oven and preheat your broiler set at high.  

Line a baking sheet with aluminum foil and lightly grease with olive oil.  (I used non-stick foil and left out this step).

Remove the salmon from the marinade and place onto the lined baking sheet.  Sprinkle with a bit of salt and pepper and place under the broiler.

Cook for 10 minutes.  

Remove and brush top of the salmon with the glaze.  Cook for another 2 minutes, or until it easily flakes with a fork.

Remove immediately, sprinkle with toasted sesame seeds and chopped green onions if using them.

Serve and enjoy!

One serving is 463 calories


What do I think of this meal?  It was excellent and I shall be making it again.  I served it with Wild Rice Salad with Cranberries, Apricots and Avocado.  The recipe is here.

Thanks for looking at today's recipe.
Enjoy your day!


Monday, October 3, 2022

MONDAY RECIPE POST - BEEF AND POTATO STEW

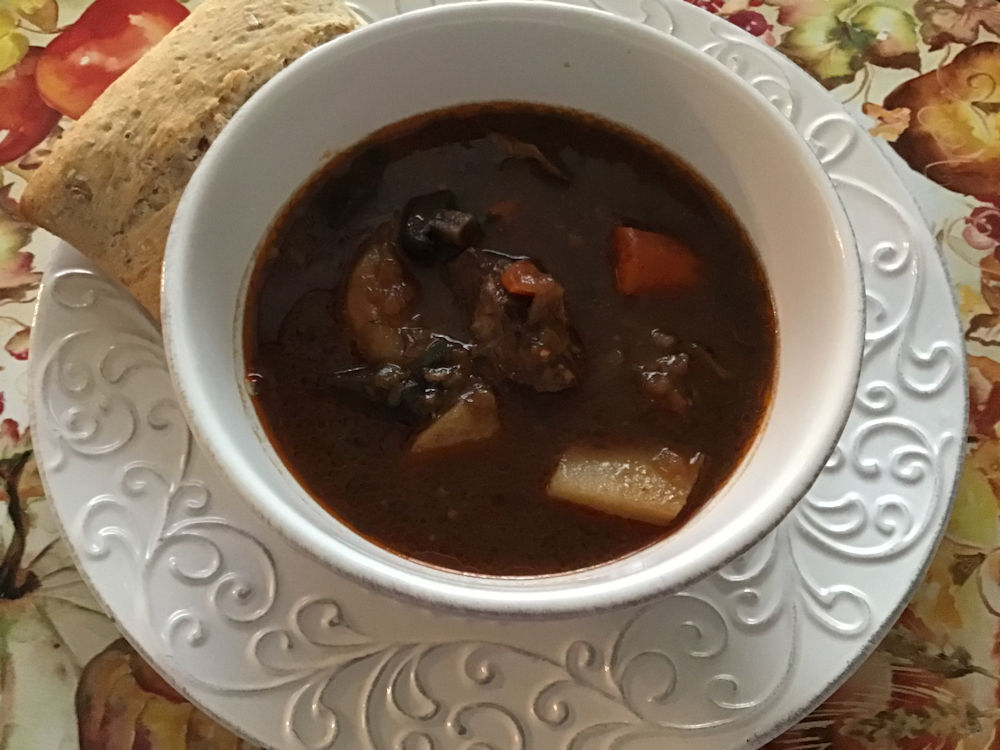
This is our first beef stew of the season, always a favorite request.  I usually try different versions. This one added more potatoes (though you wouldn't know it by looking at those photos) and a few new twists at the end of the recipe, Balsamic Vinegar and Horseradish stirred in just before serving up (see my notes at the end of the recipe).  With the start of the colder months (even though the days are still very nice), the evenings are a little chillier and it felt like it was time to make a beef stew.

I found it at Eating Well and you can find the original recipe here.


Beef and Potato Stew – 8 servings

Serving size: 1-1/2 cups - 435 calories in each serving.

This beef and potato stew is slow-cooked (not slow-cooker as I first thought) to perfection, and you end up with a delicious gravy and the meat is very tender.  Very important for me, you can make it ahead of time.  I would have no problem doing this the day before.


3 lbs. pounds boneless beef chuck roast, cut into 1 1/2-inch pieces

1-1/2 teaspoons salt, divided

1 teaspoon ground pepper

2 tablespoons extra-virgin olive oil

2 medium onions, chopped

8 cloves garlic, peeled and smashed

¼ cup unsalted tomato paste (we bought a 7 oz. can and used it all)

1 tablespoon chopped fresh rosemary

¼ cup all-purpose flour

2 cups dry red wine, such as cabernet sauvignon (I used Meiomi Pinot Noir, which is a family favorite, not that we are wine connoisseurs, we just know what we like.  We usually pour ourselves a glass and serve with our meal)

4 cups unsalted beef broth

5 fresh thyme sprigs

1 bay leaf

1 (24 ounces) package baby Yukon Gold potatoes, halved

3 medium carrots, peeled and cut diagonally (1-inch)

2 tablespoons balsamic vinegar

1 tablespoon prepared horseradish

Chopped fresh parsley for garnish


Position rack in bottom third of oven; preheat to 325°F. 

Heat a large ovenproof Dutch oven over medium-high heat. 

Toss beef with 1 teaspoon salt and pepper in a large bowl. 

Add oil to the pot and swirl to coat. 

In 3 batches, add beef; cook until browned on 2 sides, 2 to 3 minutes per side. 

Transfer to a plate. 

Repeat with the remaining beef. 

Reduce heat to medium and add onions and garlic; cook, stirring often, until softened and starting to brown slightly, about 3 minutes. 

Add tomato paste and rosemary; cook, stirring constantly, until fragrant and the tomato paste darkens, about 1 minute. 

Stir in flour; cook, stirring constantly, until the vegetables are coated, about 1 minute. 

Stir in wine and bring to a boil; cook, stirring, until glossy and thickened, about 5 minutes. 

Add broth, thyme sprigs, bay leaf and the remaining 1/2 teaspoon salt; bring to a boil. 

Stir in the beef and any accumulated juices. 

Remove from heat and cover tightly with a lid. 

Transfer to the oven and bake until the sauce has reduced and the beef is mostly tender, about 2 hours. 

Remove from oven; stir in potatoes and carrots. 

Cover and continue baking until the beef, potatoes and carrots are tender, about 1 hour. 

Don't forget to take the thyme sprigs out and the bay leaf before serving.

Stir in vinegar and horseradish. 

Garnish with parsley, if desired.


To make ahead

Refrigerate in an airtight container for up to 5 days or freeze for up to 3 months.

If you are following such things, the nutritional values can be found at the original recipe, the link I have provided in the beginning of the recipe.  


We thoroughly enjoyed this beef and potato stew.  It was delicious!  

I ended up using a slow cooker, even though the above version was made for the oven.  This was because we didn't have a Dutch Oven big enough to fit all the ingredients, and the container for the slow cooker fit perfectly.  I looked at another recipe cooked that way, and they said put it on low for 7-8 hours.  We found that ours cooked faster, and after checking at 6-1/2 hours, everything was cooked perfectly.  So, if you end up using a slow cooker, I would check to see if it is done after 6-hours.  It worked for us and everything was very tender.

We cooked all the ingredients in a large frying pan up to the point of adding the already seared beef.  Instead, we put the meat into the slow cooker, and carefully poured all the other cooked ingredients over the top, and then turned on the slow cooker.

I added a container of mushrooms along with everything else.  On reflection I would have added two containers.  Also, my co-chef in the kitchen suggested we add more potatoes, more carrots and even more onions.  

This version doesn't have a lot of salt in it, which is a good thing if you are watching how much you use for health reasons.  We are trying to watch our salt intake and if you need more, you can always add it at the table.  Depends on your own taste.  

Don’t forget to remove the sprig of thyme and bay leaf. 

Neither of us felt like adding the Balsamic vinegar or the horseradish when suggested.  I added a dash of vinegar in my bowl at the table.  Both of us preferred it without as the broth was incredible.

I forgot to add chopped parsley at the end of the meal, which would have made it look prettier.  A little green goes a long way.  I wasn't really satisfied how it looked in my photos, but at least it tasted great.

One more thought, adding a little extra flour to make a thicker broth/gravy.

We added a nice crusty roll for dipping.

A big thumb's up from both of us and we are enjoying the leftovers, which only seemed to get better.

That's about all I can think of.  If you have any suggestions of your own, I would be happy to hear them.

Thanks for stopping by, enjoy your week 
and Bon Appétit!