Showing posts with label Vegetables. Show all posts

Tuesday, December 2, 2025

MY USUAL MONDAY MORNING RECIPE POST ON TUESDAY - CHEDDAR CORN CHOWDER - 10 TO 12 SERVINGS

Soup weather and we love soups. I found this one at a favorite, Ina Garten at the Barefoot Contessa website, original link for the recipe is here.

Cheddar Corn Chowder - 10 to 12 servings

8 ounces bacon, chopped

1/4 cup good olive oil

6 cups chopped yellow onions (4 large onions)

4 tablespoons unsalted butter

1/2 cup all-purpose flour

2 teaspoons kosher salt

1 teaspoon freshly ground pepper

1/2 teaspoon ground turmeric

12 cups chicken stock, preferably homemade

6 cups medium-diced white boiling potatoes, unpeeled (2 pounds)

10 cups corn kernels, fresh (10 ears) or frozen (3 pounds)

2 cups half-and-half

1/2 pound sharp white Cheddar cheese, grated


In a large stockpot on medium-high heat, cook the bacon and olive oil until the bacon is crisp, about five minutes.

Remove the bacon with a slotted spoon and reserve. 

Reduce the heat to medium and add the onions and butter to the fat. Cook for 10 minutes or until the onions are translucent.

Stir in the flour, salt, pepper and turmeric. Cook for three minutes. 

Add the chicken stock and potatoes, bring to a boil and simmer, uncovered, for 15 minutes, or until the potatoes are tender.

If using fresh corn, cut the kernels off the cobs and blanch the kernels for 3 minutes in boiling, salted water. Drain (if you are using frozen corn you can skip the above step.)

If using frozen corn, add it to the soup, then add the half-and-half and Cheddar cheese.

Cook for 5 more minutes until the cheese is melted.

Season to taste with salt and pepper.

Serve hot with a garnish of bacon.


Our verdict was that this was an excellent soup. In the photo above, I went overboard on the bacon but it still tasted great. I left bacon off the second night and liked it just as much, maybe even a little more.

 I have never added turmeric to anything but keep 
hearing good things about it and now have a few recipes where it is used, mostly in beverages at the moment. 

People add it to soups for both its flavor and its health benefits. It is said that it provides a warm, earthy and slightly peppery taste, and a vibrant golden color. Additionally, it is prized for its anti-inflammatory and antioxidant properties, with its active compound of curcumin being enhanced when combined with black pepper. Anyway, it had a pleasant flavor I've never tasted before, hard for me to describe as it was in the background, but I wouldn't hesitate to use it again.

I thought maybe next time I would reduce the amount of whole corn kernels and add an extra can of cream-style instead. This is just for our personal preference.

We served it with a crusty roll which was very good. 

We have lots and lots of leftovers so I won't be cooking for the next few days. Our main meal is set but we may end up freezing a few portions for another day.

We didn't make any changes as we had everything on the list of the ingredients. 
I wanted to show you what it looked like before the pepper. I added a good sprinkling as there are times I feel like it and other times not. Apparently, freshly ground black pepper activates the good properties in the turmeric. I have to read more on the subject.

The full address for this soup is below, just in case you prefer to copy and paste rather than click on the link at the beginning.

https://barefootcontessa.com/recipes/cheddar-corn-chowder


Thanks for dropping by and I hope 
your day is a great one.

Bon appétit!


Monday, January 15, 2024

MONDAY MORNING RECIPE POST - MARTIN LUTHER KING JR'S BIRTHDAY AND A RUSTIC TOMATO AND VEGETABLE SOUP, PLUS A SNOW DAY

I put this post together over a week ago and at the time I didn't realize Dr. King's birthday would be today also. I added this a little before noon. Here in America we are observing the birthday of Martin Luther King Jr. It is a federal holiday and I am sharing a link to his biography. Below is a picture I found online of his memorial in Washington DC.  Happy Birthday Dr. King!
(picture from pixabay.com)

 It snowed today, not a heavy one. The flakes will fall for another hour and stop, according to our weather forecast people. We will have more snow on Wednesday and will have to wait to see what that brings.  Soup will be very welcome. 
I found this week's recipe at Lexi's Clean Kitchen.  You can see the original recipe at this link. It is a delicious soup, and we made a few changes which I have mentioned below. I always recommend visiting the website, for all the other great recipes offered, but also to see the tips left for this one.

Rustic Tomato Vegetable Soup

Serves 6 - Calories in a 1 bowl serving: approximately 88

1 tablespoon extra-virgin olive oil

1 onion, diced

2 cloves garlic, minced

3 carrots finely diced

2 celery stalks, finely diced

1-½ teaspoons fine sea salt

½ teaspoon ground black pepper

2 teaspoons dried oregano

1 teaspoon dried basil

1/2 teaspoon garlic powder

1/2 teaspoon onion powder

Pinch of red pepper flakes (optional)

¼ cup tomato paste

1 28 oz. can organic diced tomatoes

3 cups chicken or vegetable stock, more as needed

2 cups diced green beans, about 1” pieces

1 large russet potato, peeled and diced

2 cups cauliflower florets, diced

1 15 ounce can kidney beans, drained (optional)

Big handful of baby spinach

Grated Parmesan cheese to garnish (optional)


Heat oil over medium heat in a Dutch oven. Once hot, add onion and garlic.  Cook for 3 minutes, until it begins to soften.

Add in carrots and celery.  Let cook over medium heat for 8-10 minutes, until soft and fragrant. Stir occasionally.

Add in salt, pepper, oregano, basil, garlic powder, onion powder, red pepper flakes, tomato paste and diced tomatoes and cook for 1-2 minutes, until fragrant.

Add in broth. Bring to a boil then reduce heat. 

Add in green beans, potato, cauliflower and kidney beans and let simmer for 25 minutes, or until the vegetables are cooked through.

Add in spinach and let simmer until cooked through. Add in more broth for desired soup consistency.

Taste and adjust seasoning. Serve warm with a sprinkle of parmesan cheese, if desired.

An excellent soup, it tasted delicious!  

Lexi mentioned it was easy to substitute to your own vegetable medley or make additions. We used sweet peas instead of green beans, garbanzo beans instead of kidney beans and I added a portion of frozen spinach instead of fresh spinach. I didn't measure this out, just filled a small bowl and put the contents into the pot.

When cooking the vegetables, the potatoes and cauliflower weren't done as much as I would like, so I added another 5 minutes to their cooking time, 30 minutes instead of 25. You might find them perfect, just up to our own personal taste, so best to check. 

I didn't use chicken or vegetable broth.  I already had a container of already opened beef broth in the fridge used in a recipe from the day before. When using beef broth I usually add a cup of red wine at the same time as the broth if I have it available.

I also stirred in 1-1/2 tablespoons of brown sugar to take any acidity out of the tomatoes.  Gregg thought an extra tablespoon on that amount should be added next time.  We both constructively critique what we make, always.  We actually find that it not only helps to improve the dish, it also adds to the fun of cooking together.  

I had half a packet of frozen cheese tortellini and added that towards the end of the cooking time.

This is a great soup for using what you have in your pantry, fridge or freezer. Additions and substitutions of course alter the amount of calories, and you would have to adjust if you are watching such things.

There were leftovers for another day, and also for freezing. 

You can store in fridge in an airtight container for up to 3 days.

If you are going to freeze, put portions into your freezer-safe containers. I have a supply of 1 cup, 2 cup and four-cup sizes. Just let the soup cool completely before putting in the freezer. You can freeze it up to three months. When ready to serve again, fully defrost in the refrigerator overnight and reheat on the stove until warmed through.

Here is the full address if you prefer to copy and paste.

https://lexiscleankitchen.com/rustic-vegetable-tomato-soup/


I think that's all but if you have any questions, please don't hesitate to ask in the comment section.



Monday, February 14, 2022

MONDAY RECIPE POST - CABBAGE STEW WITH MINCED MEAT AND POTATOES - 4 TO 5 SERVINGS

I saw this recipe on Pinterest and as I had all the ingredients we needed in the fridge or the pantry, except for the marjoram and chives, I knew what our next meal would be.  The blog where it originated - Bake To The Roots - is hosted by Marc.  His bio says he is a  graphic designer who is German and lives in Berlin, and also likes to cook.  You can read all about him here, and you can see his recipe at this link.


Cabbage Stew with Minced Meat and Potatoes

Servings: 4 to 5 people


1 small cabbage (about 27 oz.)

16 oz. (450g) potatoes (waxy)

1.8 oz. (50g) bacon, diced

2 tbsp. olive oil

1 large onion, chopped

2 garlic cloves, chopped

14 oz. (400g) minced meat (beef and pork)

2 tbsp. tomato paste

1 tsp. smoked paprika powder

1/4 tsp. marjoram

1/4 tsp. thyme

salt, pepper

30 fl. oz. (900ml) vegetable broth (hot)


Garnishes:

Sour cream

Chopped chives


Halve the cabbage, remove the stalk and cut into bite-sized pieces. 

Peel the potatoes and cut them into cubes. 

Peel and finely dice/chop the onion and garlic.

Heat the oil in a large pot. 

Add the diced bacon and fry briefly until lightly browned. 

Add the onion and garlic and sauté for about 2-3 minutes. 

When the onions have started to brown, add the ground meat and stir until cooked through and no longer pink. 

Add tomato paste, paprika powder, marjoram, and thyme. 

Also add salt and pepper to taste.  

Give everything a stir.

After a few minutes add cabbage and potatoes and continue cooking for about 2-3 minutes. 

Pour in the hot vegetable stock and stir with a wooden spoon, making sure to deglaze the fond at the bottom of the pot.  

Bring everything to a boil, then reduce heat and let everything simmer for approximately 30 minutes. The potatoes should be cooked through, and the cabbage should still have a little bite. 

Season to taste and serve with some sour cream and chopped chives.

Another delicious meal, thank you Marc!  As this was the end of the week and it was time to use any vegetables left in the fridge, we added a container of mushrooms and 3 sticks of sliced celery, at the same time as the other vegetables.  

I didn't have any marjoram and replaced it with dried basil.

A crusty roll would have gone nicely with this, but we both felt it wasn't necessary.  It is a very hardy stew.

This was excellent on a cold, chilly night.

We topped it with sour cream at the table, and would have used sliced green onions if we had any.

My dear other half thought we should cook a couple of extra slices of diced, crispy bacon, and sprinkle it on top with the sour cream for a tasty addition.


Thanks for looking and enjoy the rest of your week.


Monday, January 3, 2022

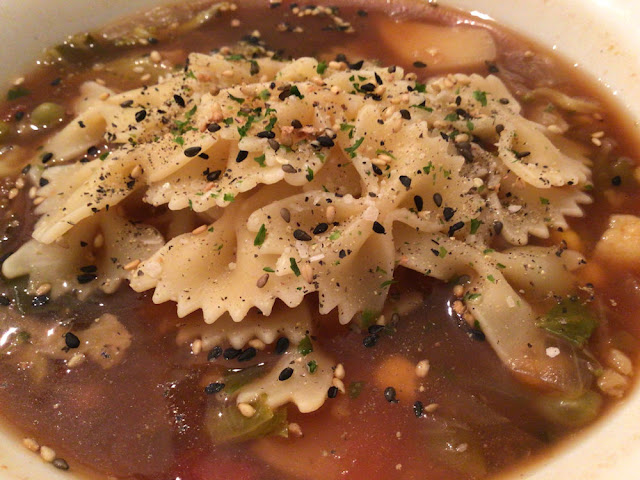
MONDAY RECIPE POST - VEGETABLE SOUP WITH BUTTERFLY PASTA

I thought it would be nice to make soup for today's post.  I don't have a link for the recipe as I just add whatever vegetable I have available, and there are plenty in here.


Vegetable Soup

2 tablespoons olive oil

1 yellow onion, finely chopped

2 cloves finely chopped garlic (optional)

6 cups vegetable broth 

1 cup red wine

7 ozs. tomato paste

3 cups diced tomatoes use fresh or canned

16 ozs. frozen peas

16 ozs. frozen corn

2 carrots, thinly sliced

4 celery stalks, thinly sliced

1-2 russet potatoes, cubed

Small head of broccoli

Small head of cauliflower

1 cup butterfly pasta, uncooked


Grated Parmesan Cheese for serving


Heat the oil in a large saucepan over medium heat.  

Add the onion and garlic if using. Stir until they become transparent; about 2-3 minutes.  

Add the broth and tomato paste; bring to a boil.

Add the remaining ingredients except for the butterfly pasta.  Cover and reduce heat to low. Simmer until your vegetables are cooked, about 35-40 minutes.
 

We cooked our pasta in a separate pot according to the package directions, and added them to the soup after draining.  You can probably save this step and add to the broth, timing at your own discretion.

Soup can be stored in the fridge for up to one week, or in the freezer for up to six weeks.

Yield: 8-10 servings

So, what did we think?  

This is one of our favorite soups that we have made several times.  It is always very tasty, and it always looks different every time as you can use any of your preferred vegetables, and garnishes, whatever you have available. 

It is very hardy and it stands on its own. At 
times all we have done is sprinkle grated Parmesan cheese over the top, with lots of pepper.  

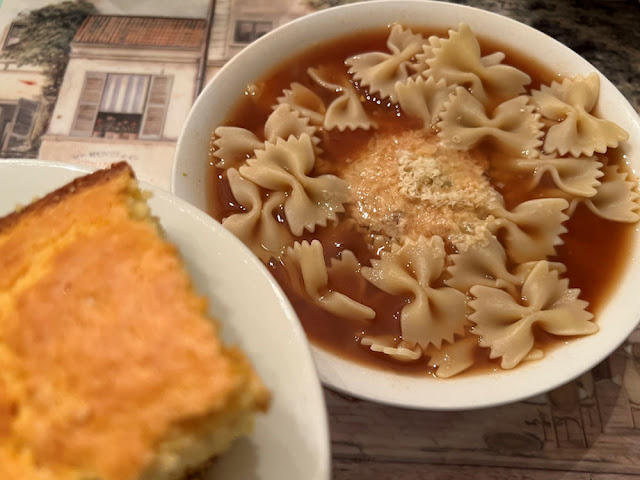
We have also served it with a crusty bread or cornbread.

The soup only seems to get better after two or three days.  I freeze the leftovers and have doubled  original ingredients so that I can do just that.

A favorite sandwich would go nicely with this. Plain old cheese on toast is another we have paired it with.

If you find you are using up all the broth, add a little more to make it more of a soup.  

You can add your own seasonings on top.  In these pictures I used my furikake umeboshi.  Sliced green onions are good also. Each night for three nights we tried something different on top and enjoyed them all.


Thanks for looking and have a great week!


Monday, May 24, 2021

MONDAY RECIPE POST - QUICK AND EASY MEDITERRANEAN QUINOA SALAD

A different kind of salad for us, and there were none of the mixed greens that we normally eat.  Quinoa is not something we have had a lot of but we enjoyed it very much in today's salad.  If you go here you will be able to see the original recipe.  


Quick and Easy Mediterranean Quinoa Salad

Servings: 6-8


Ingredients

1/4 cup olive oil

2 tablespoons red wine vinegar

1 tablespoons balsamic vinegar

1/2 lemon, juiced

1/2 teaspoon dried oregano

1 teaspoon dried basil

2 teaspoons minced garlic

½ teaspoons each salt and pepper

4 to 5 cups cooked chilled quinoa

1-1/2 cups cherry tomatoes, halved

1 cucumber, diced

1 yellow pepper, diced

1/2 cup Kalamata olives, sliced

1/2 red onion, finely chopped

2/3 cup feta cheese, crumbled


If you have an empty jar with a lid (I keep an old pickle jar in the cupboard for this purpose), add olive oil, vinegars, lemon juice, oregano, basil, garlic, salt, and pepper to a jar or container. Put the lid on the jar and shake thoroughly to combine. Set aside.

In a large bowl, combine remaining ingredients and mix gently.

Just before serving, give the dressing another quick shake and pour over the salad. Mix gently to coat all ingredients. Serve immediately.


Notes

When preparing quinoa, 2 cups uncooked quinoa equates to about 4 to 5 cups cooked.

To make this a full meal, add grilled chicken or salmon and serve on top of the salad. Alternatively (if you don’t eat meat), add one can of rinsed chickpeas directly into the salad and mix together.


This makes a very nice side salad, and I also enjoyed it for lunch on its own the day after.  I would definitely make it again and perhaps add the chickpeas suggested next time.  If you take a look at the website here, you will be able to see the original recipe.  Always interesting to look at the photos and read the author's process.  Fun to look at all the other recipes she has to offer.

I thought I would add this interesting information about quinoa. You can read this and much more at the following link:


Quinoa (pronounced KEEN-wah) is the seed of the Chenopodium quinoa plant.

Botanically speaking, it’s not a grain. However, it’s often called a “pseudograin” because it’s similar in nutrients and eaten the same way as cereal grains.Source

Quinoa was first grown for food 7,000 years ago in the Andes. The Incas called it “the mother grain” and believed it was sacred.Trusted Source

Although it’s now grown around the world, the majority is still produced in Bolivia and Peru. It was largely unknown to the rest of the world until very recently.Source 

Since then, it has experienced a huge surge in popularity because of its high nutrient content and health benefits. It is also easy to grow in a range of conditions. 

In fact, the year 2013 was named “The International Year of Quinoa” by the UN because of its valuable qualities and potential to fight world hunger.

Quinoa is also popular because it’s a gluten-free grain. This means people with celiac disease, wheat allergies or those who avoid gluten can consume it.”


Monday, April 6, 2020

MONDAY RECIPE POST - MASHED POTATO AND CAULIFLOWER GRATIN


I haven't made any new recipes lately, just ones we have done a lot of times before.  All favorites but as ingredients for certain foods are harder to find now, we are sticking with the basics.  Therefore, I'm sharing this one, another old favorite.


Cooking nicely in the oven.  This is before I put the broiler on to brown a little more.
I found this on Epicurious which you can find here. It is part of their Thanksgiving Menu.  I know we have a ways to go before Thanksgiving, but we are not waiting until then to try this dish again.

Mashed Potato and Cauliflower Gratin  
Makes 8 servings
Active time: 1 hour - Total time 2 hours

2 pounds russet (baking) potatoes, peeled and cut into 1-inch pieces
Salt
1-1/4 cups whole milk, divided
1 stick (8 tablespoons) unsalted butter, divided
4 ounces coarsely grated Italian Fontina or Gruyere cheese (about 1 cup packed)
1/4 teaspoon freshly ground black pepper
1 (2 to 2-1/2 pound) head cauliflower, cut into 1-1/2 inch pieces, including stems and core
3 garlic cloves, peeled and smashed
3/4 to 1 cup grated Parmigiano-Reggiano, divided 

Put potatoes and 2 teaspoons salt in a large heavy saucepan, and cover with cold water (about two inches over the top of the potatoes, make sure your pan is large enough to accommodate).  Bring to a boil and cook, partially covered, until potatoes are tender, 15 to 20 minutes.

While potatoes are boiling, heat 3/4 cup milk and 3 tablespoons of butter in a small saucepan until butter is melted and milk is hot, but not boiling.  Keep warm off the heat, covered.  

Drain potatoes well in a sieve or colander and return to hot saucepan.  Add milk mixture, Fontina (or Gruyer) and pepper, and mash with a potato masher or fork to desired consistency.  Season with salt and keep warm, covered.  


Bring a pot of well-salted water to a boil, then add cauliflower and garlic, and simmer until cauliflower is very tender, 13 to 15 minutes.

Drain cauliflower in a colander and pulse with remaining 1/2 cup milk, 1/2 cup Parmigiano-Reggiano, and 3 tablespoons of butter in a food processor until it is chunky puree.  

Stir the mashed potatoes and cauliflower mixture together in a large bowl, and season with salt and pepper.  Transfer to a buttered 3-quart flameproof, shallow baking dish (not glass).

Heat oven to 425 deg. F. with rack in middle.  Melt remaining 2 tablespoons butter, and gently brush over potato-cauliflower mixture, then sprinkle evenly with remaining 1/4 to 1/2 cup Parmigiano-Reggiano (to taste).  Bake until potato mixture bubbles around edges, about 20 minutes.

Turn on broiler and broil 6 to 8 inches from heat, until topping is browned in spots, 1 to 2 minutes.

The cook notes that the potato and cauliflower mixture can be made up to 2 days ahead, before brushing the melted butter and sprinkled cheese over the top.  Bring to room temperature, then bake and broil as directed.  

Recipe can be halved and baked in a 2-quart flameproof shallow baking dish.


It was a wonderful side dish.  The cheese sprinkled on the top turns into a lovely crust and is the yummiest.

As sometimes happens there were a few changes. I forgot to add the garlic when cooking the cauliflower, but it certainly didn't detract from the taste of the dish.  

I missed the part where you put the potatoes back into the oven.  Instead after draining them I tossed them into the mixing bowl of my stand mixer, along with the milk-butter mixture and cheese. I mixed them into a mash, tossed the cooked cauliflower in and combined thoroughly.  The other way there would be more texture to the vegetables, but we enjoyed this creamy mash version.

I also used 1% milk instead of the whole milk, only because it was snowing like the dickens today and didn't feel like driving up to the store in that mess just for milk (that was on January 21st).  I like to use what is in a recipe but after tasting the finished product, I will stick to the 1%. The dish was still very creamy and didn't seem to miss it.

We both loved the combination of mashed potatoes and cauliflower. My Mum used to make something similar when we were kids.  (We have also recently discovered how much we like mashed potatoes with rutabaga.  An equal amount of both veggies, boiled until tender, and mixed with butter (or if you want a lighter version, low-sodium chicken broth, being careful not too add too much liquid that it goes soupy), sour cream, salt and pepper.  

When I make a normal size dish I usually make one to eat that day and one to freeze.  There were also leftovers that only seem to taste better the next day.

I served this with ham and broiled tomatoes but it would be good with any number of dishes, or even on its own for a light supper.  This side dish could be served at any mealtime, and I think it would go great with eggs, mushrooms or a favorite fruit.  
Knowing that many of us globally are still sheltering in place, I will wish you a great week, one that is keeping you happy and healthy.

Here's a smile for you from Ina Garten.
Click here to watch her make a refreshing Cosmopolitan.  Thank you Ina!


Sunday, January 26, 2020

MONDAY RECIPE POST - CRISPY PEANUT TOFU AND CAULIFLOWER 'RICE' STIR-FRY


I have been looking for meatless meals to put into our weekly meal plan.  As we are both Thai food fans, I chose this one.  

We found the meal at Minimalist Baker at this link, hosted by Dana.  I recommend reading her information and advice while making this recipe.  She also has a great food blog with many delicious recipes.  Thank you Dana for adding to our list of favorite meals.


Crispy Peanut Tofu and Cauliflower Rice Stir-Fry

The tofu is baked not fried, served over cauliflower rice with sautéed vegetables.

Preparation time: 30 minutes
Cooking time: 1 hour 30 minutes
Serves 2
Freezer: sauce only, nothing else

Ingredients:

Stir-fry:

12 ounces extra firm tofu (organic and non-GMO if possible)
1 tablespoon toasted sesame oil
1 small head cauliflower

2 cloves garlic (minced - 2 cloves yields 1 tablespoon or 6 g)

Sauce:

1-1/2 tablespoons toasted sesame oil
1/4 cup low sodium soy sauce (tamari for gluten free eaters)
1/4 cup light brown sugar (or honey if not vegan)
1/2 teaspoon chili garlic sauce
2-1/2 tablespoons peanut butter or almond butter (natural, salted)

Optional extras:

Vegetables: baby bok choy, green onion, red pepper, broccoli

Toppings: fresh lime juice, cilantro or Thai basil, sriracha

Instructions:

First step, drain tofu for 1-1/2 hours before you serve up your meal.  The instructions say that if your block of tofu is larger than 12 ounces, trim it down, that you don't need a full pound for this recipe, though truthfully we added the whole 16 ounces.

Roll tofu in a clean, absorbent towel several times, and then place something heavy on top to press.  Our blog host used a pot on top of a cutting board, and occasionally added something to the pot to add more weight.  Do this for about 15 minutes.

Near the end of draining, preheat oven to 400 degrees F. (204 C.) and cube tofu.  Place on a parchment-lined baking sheet (I used non-stick aluminum foil) and arrange in a single layer.  Bake for 25 minutes to dry/firm the tofu.  Once baked, remove from the oven and let cool.

Prepare sauce by whisking together ingredients until combined.  Taste and adjust flavor if needed.  Our blog host often adds a little more sweetener and peanut butter (we felt it was fine without the extras.)

Add cooled tofu to the sauce and stir to coat.  Marinate for at least 15 minutes to saturate the tofu and infuse the flavor.

In the meantime shred cauliflower into 'rice' by using a large grater or food processor.  You don't want it to be too fine, just somewhere close to the texture of rice.  Set aside.

Mince garlic if you haven't already done so, and prepare any vegetables you want to add to the dish (this is optional).

Heat a large skillet over medium to medium-high heat, and if adding any vegetables to your dish, cook them now in a drizzle of sesame oil and a dash of soy sauce.  Remove from pan and set aside.  Cover to keep warm.

Using a slotted spoon, put the tofu into preheated pan.   Drizzle a few spoons of sauce to coat.  Cook, stirring frequently for a few minutes until browned.  It will stick to the pan a bit, but don't worry.  Remove from the pan and set aside.  Cover to keep warm.

Rinse your pan under very hot water and scrape away any residue.  Place back on oven top.  Add a drizzle of sesame oil to the pan, then add garlic and cauliflower rice and stir.  Put cover on to steam the 'rice'.  Cook for about 5-8 minutes until slightly browned and tender, stirring occasionally.  Next add a few spoons of sauce to season and stir.

In two individual plates or bowls, divide equally the cauliflower rice, top with your vegetables and tofu.  Serve with any leftover sauce.  

Leftovers reheat well and will keep covered in the fridge for up to two days.  

This is approximately 524 calories per serving.  

What did we think?  Delicious!  Not much here that we would change.  We enjoyed it just as the recipe said.

There were leftovers for the next day and as often happens, the meal tasted even better.