Showing posts with label Cookies and Bars. Show all posts

Monday, June 16, 2025

MONDAY MORNING RECIPE POST - ALMOND TASSIES - MAKES 4 DOZEN

There were no new recipes made this week, but I did find this on my old blog. As I haven't posted a cookie/dessert in a while, I thought to share it. I don't have a link as when I checked, it had run out. I wrote about them sticking to the pan and having to throw the first batch away. I have no recollection of this now, but my notes I made when making them are below. 


Almond Tassies

A rich buttery crust holds a meringue filling flavored with almond paste. They are a pretty looking cookie.

2 cups butter, softened

1 cup sugar

2 egg yolks

3 cups all-purpose flour

1 teaspoon salt


Filling:

1 can (8 ounces) almond paste

1 cup plus 1 tablespoon sugar, divided

2 egg yolks

1 teaspoon lemon juice

3 egg whites

1 teaspoon vanilla extract

Almonds to garnish (the original recipe required 1/2 cup chopped pecans, but I changed it to sliced almonds)


In a mixing bowl, cream the butter, sugar and egg yolks. Gradually add flour and salt. Divide dough into fourths. Roll each portion into 12 small balls. Press each ball onto the bottom and up the sides of greased miniature muffin cups; set aside.

For the filling: combine almond paste, 1 cup sugar, egg yolks and lemon juice in a large mixing bowl. In a small mixing bowl, beat egg whites until soft peaks form; beat in vanilla and remaining sugar until stiff peaks form. Beat into the almond mixture.

Fill prepared cups three-fourths full. Garnish with sliced almonds (or sprinkle with pecans as in the original recipe). Bake at 325 degrees for 20 to 25 minutes or until lightly browned. Cool on a wire rack for 10 minutes. Carefully remove Tassies from pans.

Yield: 4 dozen.


I enjoyed making them but had a bit of difficulty due to using two different miniature muffin pans. The first pan I used they came out great - non-stick and a better-quality baking pan I'm thinking. The other pan wasn't non-stick, and even though I greased both thoroughly, the second set just fell apart when I tried to remove them. 

You have to like Marzipan to enjoy these. They are a bit fiddly to make but I took them over when I got together with a group of friends for coffee. They all enjoyed them and there were none left, and everyone asked for the recipe.

Thanks for looking, have a great week 
and Bon Appétit!


Monday, February 26, 2024

MONDAY MORNING RECIPE POST - SOFT BANANA COOKIES - MAKES 36 COOKIES AND CAN BE FROZEN

As I had a few overripe bananas, and wanting a change from banana bread, I found this recipe at Savory Experiments hosted by Jessica. You will find the original recipe at this link. I would encourage taking a look at her photos, and also read all the great tips. Mine turned out a bit darker but they were excellent. Gregg felt he was eating a mini banana bread. I had added cinnamon following the ingredients list.  They were a delicious addition and not overpowering!


Easy Banana Cookie Recipe


Preparation time:  10 minutes

Cooking time: 10 minutes

Chilling time: 2 hours

Total time: 2 hours 20 minutes 

Servings: 36 cookies 


Cookie Dough Recipe:

3-3/4 cups flour

1-1/2 teaspoons baking powder

1 teaspoon ground cinnamon

1/2 teaspoon fine sea salt

1/4 teaspoon ground nutmeg (optional)

1 cup unsalted butter, room temperature

1 cup granulated sugar

1/2 cup light brown sugar

1 cup ripe banana, mashed (approximately 2 to 3 bananas)

1 large egg, room temperature

2 teaspoons vanilla extract


Sugar Cookie Topping:

1/2 cup sugar

1 tablespoon ground cinnamon


In a medium mixing bowl, sift together the flour, baking powder, salt, cinnamon and nutmeg. Set aside.

In a large mixing bowl or stand mixer fitted with the paddle attachment, cream together the butter, sugar and light brown sugar. When blended until light and creamy, add the egg, vanilla and mashed banana.

Gradually add the flour/baking powder mixture into to the egg/banana mixture and combine well.

Cover the bowl with plastic wrap and refrigerate for a minimum of 2 hours.

After the dough has chilled, preheat the oven to 350°F.

In a small bowl, stir together the sugar and cinnamon.

With clean hands, roll the dough into 1-1/2 inch balls. Dough might be sticky and not roll well. This is okay.  Once rolled, coat thoroughly into the cinnamon/sugar mixture. 

Place on a cookie sheet lined with parchment paper or use a silicone mat cookie sheet and place uncooked cookies 2 inches apart.

Bake for 13-15 minutes or until cookie tops start to crack. Do not wait until cookies brown, they will be overdone.

Allow the cookies to cool on cookie sheet for at least 5 minutes before carefully transferring to a cooling rack using a spatula.


What did we think?

Excellent! I ending up cooking only 4 cookies in 1 batch, two each as we didn’t want to overdo it.  The other already rolled cookies I flash froze (before baking) placed them in a sealed container.  They are in the freezer.  

I used regular butter instead of the unsalted, and kosher salt instead of the fine sea salt.

I meant to cook these after the two hours, but with one thing and another taking up my time, I left them in the fridge until the next day, and they were fine.

While they were still frozen I heated the oven to 405 degrees F., placing them on the cookie sheet and set the timer for 20 minutes. My oven always runs on the cooler side for most recipes, that's why I turned it up higher, plus the fact the cookies were frozen. You will have to be the judge for your own oven as these temperatures and timing are just a guide. It's a bit of an experiment and it might take me a couple of tries to get it to the way I think it should be. It is so nice only taking a few out at a time whenever you feel like a sweet treat. Also great for unexpected company.

If you prefer, you can thaw overnight in the fridge, and follow Jessica's instructions, maybe adding a few minutes to the cooking time if needed. I think she gives some tips on freezing.

If you prefer to copy and paste rather than use the link above, here is the full address.

https://www.savoryexperiments.com/banana-cookies/


Monday, December 19, 2022

Monday, May 9, 2022

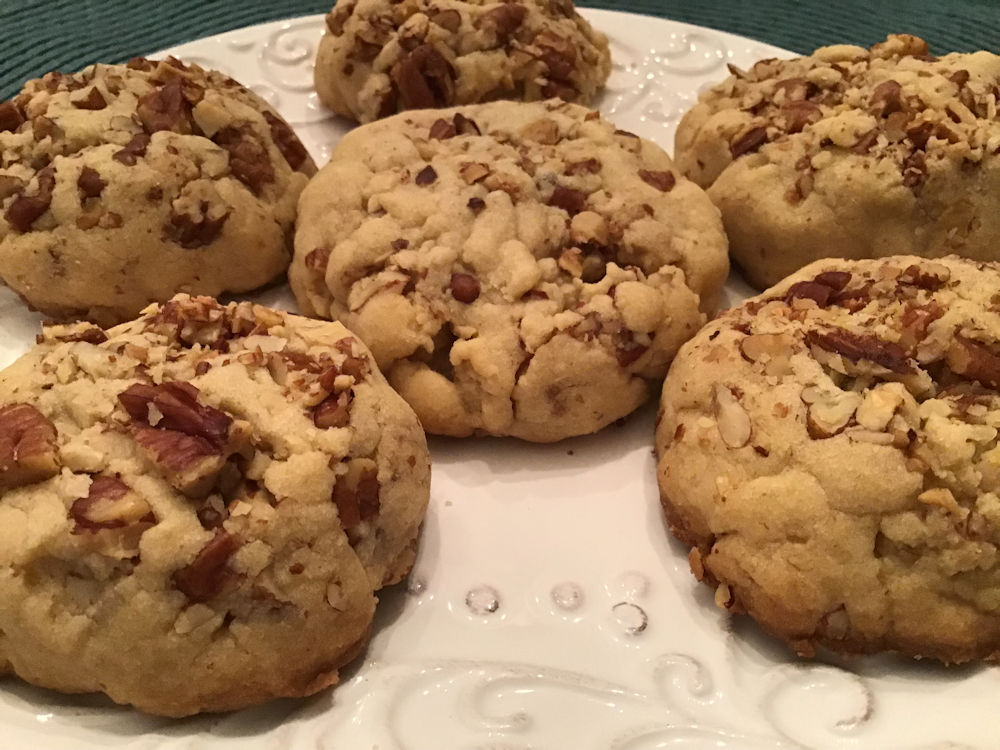
MONDAY RECIPE POST - BUTTER PECAN COOKIES

I have made Butter Pecan Cookies before, but this was a little different and I thought I would give it a try.  I found it at a blog called The Iowa Housewife and the original recipe is here.  This blog is closed now but the recipes are still there for everyone to enjoy.  I would like to thank its host for keeping it open.  

Butter Pecan Cookies


1-¾ cups chopped pecans and 1 tablespoon butter

1 cup butter softened

1 cup brown sugar packed

1 egg yolk

1 teaspoon vanilla

2 cups self-rising flour (see note below this recipe) 


Place chopped pecans and 1 tablespoon butter in a baking pan. 

Bake at 325° for 5-7 minutes till toasted. Stirring often. Let cool

In mixing bowl, cream brown sugar and remaining butter until light and fluffy. Beat in egg yolk and vanilla. Slowly add flour. Cover and refrigerate for one hour or until easy to handle.

Shape into 1-inch balls, then roll in toasted pecans, pressing nuts into dough. Place 2 inches apart on ungreased baking sheets.

Bake at 375° for 10 to 12 minutes until brown. Cool for 2 minutes on pan before removing to wire racks (they will fall apart otherwise).

*As a substitute for self-rising flour use 3 teaspoons baking powder and 1 teaspoon salt in a measuring cup before adding all-purpose flour to cup.

We really enjoyed these cookies but they looked a little different than the ones at the above website.  They didn't spread out quite as much.  I followed the directions but they came out differently.  I quickly add that they tasted great, just didn't spread out quite as much, and were a bit crumbly as we probably should have let them cool longer.

I had no self-rising flour and had all-purpose, adding the baking powder and salt as suggested (letters in red above).  Perhaps that had something to do with it, I have no idea.

I also might leave the whole egg in next time as my cookie batter seemed a little dry. But I am a stickler for following recipes corner-to-corner that first time, and I adjust later when making the next batch. This is why I add all my notes at the end of each recipe, to remind me what I said I would do.  

I also might buy a small bag of self-rising flour.  I am curious if it makes that kind of a difference.  Not an expert here mind you.  I don't do a lot of baking.

I am going to double up on the pecans at the request of my Dear Other Half.  He said why not mix them into the batter, and I said we should, why not?  Just as long as we have enough to roll each cookie in the chopped pecans.

I think that's about it for the added notes.


Thank you for stopping by and have a great week.


Monday, January 10, 2022

MONDAY RECIPE POST - OATMEAL CRANBERRY WHITE CHOCOLATE CHUNK COOKIES


I saw this recipe on the back of a packet of Craisins (Dehydrated Cranberries).  Whether it is still there, I don't know as I saved it back in 2010 and have made them several times since.  


Oatmeal Cranberry White Chocolate Chunk Cookies 

Makes approximately 2-1/2 dozen. 

2/3 cup butter or margarine, softened
2/3 cup brown sugar
2 large eggs
1-1/2 cups old-fashioned oats
1-1/2 cups flour
1 teaspoon baking soda
1/2 teaspoon salt
1 cup Craisins (Dried Cranberries)
2/3 cup white chocolate chunks or chips


Preheat oven to 375 degrees Fahrenheit.

Using an electric mixer beat butter or margarine with sugar together in a medium bowl until light and fluffy.  

Add eggs, mixing well.  

Combine oats, flour, baking soda and salt in a separate mixing bowl.  

Add to butter mixture in several additions, mixing well after each addition.  

Stir in Craisins (Dried Cranberries) and white chocolate chunks.  

Drop by rounded tablespoons onto ungreased cookie sheets.  

Bake 10 to 12 minutes or until golden brown.  

Cool on wired rack.  

Makes approximately 2-1/2 dozen cookies.


Result?  Very, very nice, especially with a cup of tea.  The first time I made them (as shown in these photos), I didn't actually use any chocolate.  I had everything else in the pantry and didn't want to go to the store just for that one ingredient.  They still tasted great.  We enjoyed them so much I now make them without, but chocolate lovers out there, go for it.

I have also used raisins instead of the Craisins.

I was careful with my tea (famous last words).  I don't usually put it quite so close to my laptop, just long enough for the photo.  The cup is a double.  There are times when you just have to use the bigger cup. (The photo is an old one taken at Meadowlark Gardens.)

Thanks for looking and enjoy your week!


Monday, July 12, 2021

MONDAY RECIPE POST - SINGLE-SERVING, DEEP-DISH CHOCOLATE CHIP COOKIE

Thank you so much for all the greetings you left on my birthday.  These added to the enjoyment of my special day very much, and I will be thanking you all individually ASAP.  

Today I am sharing an old recipe and I found it particularly good at the time.  I should put the ingredients I need on our next shopping list as it has been too long since I last made it.  All I need to add is the ice cream and the chocolate chips!

It is made for one person but is easy to adjust for for two.


Single-Serving, Deep-Dish Chocolate Chip Cookie


The original recipe was found here at Chocolate Moosey.  Carla's has great photos, and she also has some delicious sounding desserts just like this one.

Makes: 1 deep-dish cookie

2 tablespoons unsalted butter
1 tablespoon granulated sugar
1 tablespoon brown sugar
One or two drops of vanilla extract
Pinch of salt
1/2 teaspoon baking soda
1/4 cup flour
2 tablespoons semi-sweet chocolate chips
Vanilla Ice-Cream for serving.

Preheat the oven to 375 degrees F.  and take your individual-sized ramekin out of the cupboard.

In a medium microwavable bowl, melt the butter. Whisk in both sugars and vanilla.  Whisk in salt, baking soda and flour.  Blend in the chocolate chips.  Scrape the batter into the ramekin.

Bake 12 to 15 minutes or until the top is firm and light brown.  Let cool for a few minutes before serving with whipped cream or a small scoop of vanilla ice-cream.


When you feel like something sweet but don't want to go overboard this is just the ticket.  I didn't have any ice-cream but there was some whipped cream in the fridge.  I also mixed in a tablespoon of chopped pecans to the batter before putting it into the ramekin. The finished product was very yummy.

Thanks for looking and...


Monday, January 11, 2021

MONDAY RECIPE POST - RASPBERRY BARS WITH ALMONDS

It has been a while since I did any baking.  I have had this since September of last year and have been wanting to try it when the time was right.  Today was time.  I fixed this on Wednesday, January 6th, 2021.

My recipe came from Saving Room for Dessert hosted by Tricia.  One of the several reasons I saved it, apart from the fact that Gregg gave this a ten out of ten, was that you can freeze the bars once cooled.  It was noted they may not retain their crispness however, but personally I don't think I would mind that as good as they are.   Thank you Tricia!  This is a great dessert recipe.  

Raspberry Bars with Almonds

Makes 9 bars 

Quick and easy to do from preparation to oven to table.


For the crust:

1 cup granulated sugar (222g)

1 teaspoon baking powder

½ teaspoon salt

3 cups all-purpose flour (378g)

1 cup unsalted butter melted (8oz or 226g)

1 large egg lightly beaten

½ teaspoon almond extract


For the filling and topping:

1 (12.5oz) jar raspberry jam, room temperature

⅓ cup sliced almonds (30g or 1oz)


Preheat oven to 350°F. 

Light grease or spray a 9x9-inch baking pan with vegetable cooking spray. 

Line the pan with parchment paper creating a sling for easy removal. Set aside.


To make the crust:

In a medium bowl whisk together the sugar, baking powder, salt and flour.

Add the butter and mix with a rubber spatula or wooden spoon until lightly blended.

Add the egg and almond extract and mix until the dough comes together and all ingredients are incorporated.

Gently press three-fourths of the mixture into the prepared pan building up a lip around the edges to hold in the jam.

Transfer the remaining dough to the refrigerator. 

Bake the bottom crust for 15 minutes then remove from the oven to cool slightly.


For the filling and topping:

Spoon the jam over the lightly baked crust. 

Spread the jam evenly over the crust leaving a dry ¼-inch border around the edges. This helps prevent the jam from sticking to the sides of the pan and burning.

Crumble the remaining chilled dough over the jam, leaving some large clumps. 

Sprinkle the almonds over the crumbled dough. 

Bake for 35 to 40 minutes or until the top is lightly browned and the jam is bubbling. Remove from the oven and cool to room temperature, or serve slightly warm.

Cut into bars. If you have any you can dust with powdered sugar, or serve with a scoop of ice cream.  I had no powdered sugar and served this with a scoop of vanilla ice cream on the top.  For us that was perfect.


Recipe Notes

Refrigerate leftovers in an airtight container for up to 3 or 4 days. 

These raspberry bars can also be frozen but may not retain the crisp exterior.

Tricia said you could use one of your favorite jams.  Her choices were wild blueberry jam, strawberry, apricot and peach.

I didn't change a thing.  It was delicious and we served it with a scoop of vanilla ice cream.

Please be careful about letting the dessert cool long enough so the jam does not burn you.  Hot jam on the lips is terrible, learned that from experience years ago as a child.  I never forgot!

As I pondered whether we needed any extra calories by fixing dessert, I am finishing off by quoting the late-great Erma Bombeck.

"Just think of all those women on the Titanic who said, "No thank you" to desert that night.  And for what?"