Showing posts with label Vegetarian. Show all posts

Monday, August 17, 2026

MONDAY MORNING RECIPE POST - COTTAGE CHEESE MUSHROOM AND SPINACH EGG BAKE

I found this on Pinterest so there is no link. It would be easy to find if you type in the name of the quiche in the search engine once you get to the website. I looked for its author without success, though I will keep trying. We were very pleased with this dish, another 10 out of 10 if your tastes tend to go in this direction. It is advertised as an egg bake, but it looked like a crustless quiche. 


Cottage Cheese Mushroom and Spinach Egg Bake

Servings: up to 5 people

Approximately 240 to 320 calories depending on how many servings sizes you get.


6 eggs

1-1/2 cups cottage cheese

1 cup sliced mushrooms 

2 cups fresh spinach

1 cup grated mozzarella 

1/2 cup grated Parmesan 

1/2 cup Greek Yogurt or sour cream

1 small onion, diced

2 cloves garlic, minced

1 tablespoon olive oil

1 teaspoon Italian Seasoning

1/2 teaspoon garlic powder 

1/2 teaspoon onion powder

1/2 teaspoon salt

1/2 teaspoon black pepper 

Optinal: fresh parsley or chives for garnish

Heat your oven to 375 degrees Fahrenheit (190 degrees Celsius).

Wash/prepare/measure out all ingredients. Drain what you need to and get everything dry so that there is no excess liquid when you start putting everything into the baking dish/pie dish.

Lightly grease an 8 x 8 inch or 9-inch baking pie dish (we used a pie dish). 

Heat the 1 tablespoon of olive oil in a skillet over medium heat.

Add your sliced and diced onion and mushrooms. Cook for 4 to 5 minutes until softened and lightly browned.

Add your two cloves of minced garlic and the two cups of fresh spinach. Cook for another 1 to 2 minutes until the spinach wilts.

In a large bowl, whisk the 6 eggs, 1-1/2 cups cottage cheese, 1/2 cup of Greek yogurt (or sour cream), the 1/2 cup of Parmesan, 1 cup grated mozzarella, 1 teaspoon Italian seasoning, and 1/2 teaspoon each of the garlic powder, onion powder, salt and black pepper. 

Stir in the cooked mushrooms and spinach mixture.

Pour everything into the baking dish/pie dish and spread evenly.

Bake for 30 to 35 minutes, or until the center is set and the top is golden.

Let it rest for 5 to 10 minutes before slicing.

This is an easy, high protein meal you can enjoy for any meal of the day. It was delicious! The only thing I find is that our oven runs cooler and it took us an extra 15 minutes to cook, so you might have to adjust your timing according to your own oven temperature.

We served it with a mixed vegetable salad and I added raspberries, blackberries and blueberries with mine. I used a regular dinner plate, and the salad alone would have been a meal on its own, but the egg bake/quiche was a very yummy addition. Truth be told, it looked a bit lost among salad. We each had a bigger piece the next day for lunch, on its own. It was even tastier after those flavors had a chance to develop. This is the kind of dish that if you had company coming, you could make it the day before. 

You can basically see all that was put into the salad, but because I'm corner to corner, I like to make a list so that it's easier for me to put together next time. You might enjoy seeing all the additions.


Mixed spring greens

Green leafy lettuce 

Sliced radishes

Quartered Campari tomatoes

Broccoli florets

Sliced green onion

A few each of raspberries, blackberries and blueberries.

I didn't use a dressing but sprinkled a little lemon juice over the top. 

I also added a sprinkling of turmeric over mine, plus a sprinkling of black pepper. Black pepper is supposed to activate the goodness even more in the turmeric. I am always curious about such things but by all means, you should definitely ask your medical professional first if you are thinking of going the same way. There is an article here if you want to know more. Also, this link takes you to a page at the John Hopkins website where you can get even more information. 


That's about it for today. As mentioned above, 10 out of 10 for the quiche, and the salad was well received also. If you have any questions, please let me know in the comments and I'll do my best to answer.


Thanks for visiting and wishing you all a great day.


Monday, February 7, 2022

MONDAY RECIPE POST - CREAMY ROASTED CAULIFLOWER SOUP - VEGETARIAN

I found this week's recipe at Eating Well, and the original recipe was shared by Melissa Gray, which you can see here.  

My photo came out blurry and I will replace it when we make this dish again.  Melissa's photos are at the previous link.  

Thank you Melissa!  I thought this was going to be one of those change-of-pace soups, one we would enjoy but did not expect to give this a 10 out of 10.  For us, adding the lemon juice at the end of the meal was key.  Also, we changed a couple of things to suit our own taste, which I have mentioned.

This soup is egg free, gluten free, soy-free and vegetarian.


Creamy Roasted Cauliflower Soup

Servings: 4 servings 

Calories per serving: 246 


Nutritional Profile:

You can see an entire list of nutritional values at the end of Melissa's recipe here.  Just scroll down to the bottom of her recipe.

We changed a few things.  We are not cumin fans and left that ingredient out.  We also exchanged fresh oregano for fresh cilantro.


1 medium head cauliflower, cut into flowerets

2 large shallots, halved lengthwise

6 cloves garlic, smashed

½ teaspoon ground cumin (this is something we left out)

3 tablespoons extra-virgin olive oil, divided

½ teaspoon salt, divided

4 cups low sodium vegetable broth, warmed

2 tablespoons unsalted butter, melted

1 tablespoon lemon juice

2 tablespoon pine nuts or sliced almonds, toasted (we used the sliced almonds)

Crushed red pepper and chopped fresh oregano (we used cilantro) for garnish


Preheat oven to 425°F. 

Combine cauliflower, shallots, garlic, cumin (if using), 2 tablespoons oil and 1/4 teaspoon salt on a large rimmed baking sheet; toss until fully coated. 

Spread in an even layer. 

Roast for 15 minutes; remove and discard garlic. 

Stir the vegetables and continue roasting until caramelized and tender, about 10 minutes more.

Reserve 1/2 cup roasted cauliflower florets for garnish. 

Working in batches, combine the remaining cauliflower mixture, warm broth and butter in a blender (use caution when blending hot liquids). Secure the lid on the blender and remove the center piece to allow steam to escape; place a clean towel over the opening. Process until smooth, about 30 seconds. Transfer the mixture to a large saucepan. 

*Denise’s note: The following is the method I used.

Alternatively, combine the cauliflower mixture, warmed broth and butter in a large saucepan. Using an immersion blender, process until smooth, 5 to 7 minutes.*

Bring the soup to a simmer over medium-low heat, stirring occasionally. Remove from heat; stir in lemon juice and the remaining 1/4 teaspoon salt.

Divide evenly among 4 bowls; top with the reserved cauliflower florets and sprinkle with pine nuts (or almonds). 

Drizzle with the remaining 1 tablespoon oil. 

Garnish with crushed red pepper and chopped fresh oregano (or cilantro). 


To make ahead:

Refrigerator: when you have made this soup, (do not add the garnishes), you can refrigerate for up to 5 days.  Let it cool a little first as it will be very hot. 

I may be preaching to the choir, but this is a reminder for myself and also for others who are new to cooking out there.  A large pot or container of food that is hot should not be placed in the refrigerator or freezer. The hot food can raise the temperature inside the refrigerator/freezer, which can be a risk for food already stored.  There are all kinds of safety tips at this link for storing food.

To freeze, allow the soup to cool and put in freezer in air-tight container for up to 2 months. 

For both methods, reheat and add garnishes when ready to serve.


My last note for this recipe is that it came out a rather thin soup, not like the one in Melissa's photo.  Perhaps this was because she used the blender and we used the immersion blender?  Don't have a clue.  This did not detract from a delicious result, and the lemon juice added towards the end was definitely a big plus (for us).  

Gregg thought adding sour cream to this soup at the table would be a nice addition.


Thanks for looking and have a great week!


Monday, December 20, 2021

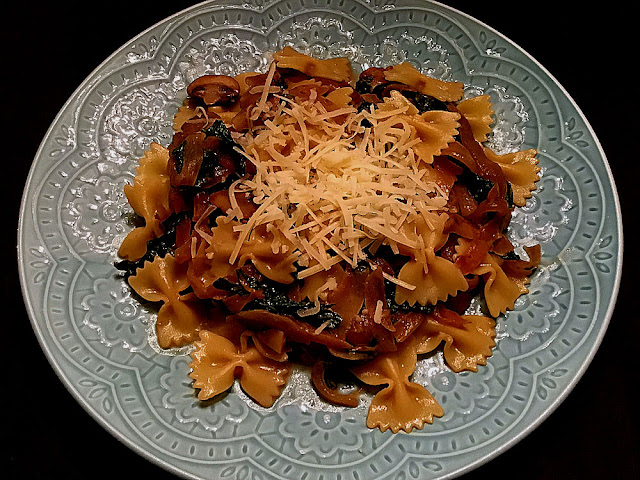
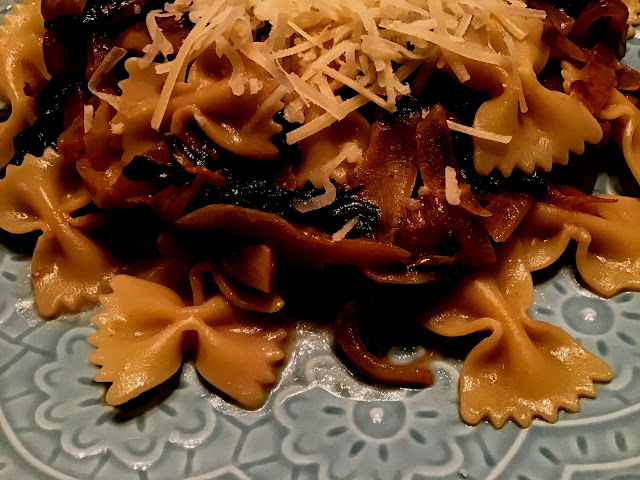
MONDAY RECIPE POST - FARFALLE (BUTTERFLY) PASTA WITH SPINACH, MUSHROOMS AND CARAMELIZED ONIONS


Today's recipe came from Julia who hosts Julia's Album. You can see the original here.  I highly recommend visiting Julia's recipe to see the very interesting information and helpful tips she shares. Plus, I want to make more of her tantalizing recipes.  We gave this a 10 out of 10, most definitely a favorite!  


Farfalle with Spinach, Mushrooms, Caramelized Onions

Serves 4


Caramelized onions:

1 tablespoon olive oil

3 yellow onions, large, sliced

¼ teaspoon salt

1 tablespoon balsamic vinegar


Creamy pasta sauce:

1 tablespoon olive oil

10 oz mushrooms, sliced (I used button mushrooms)

6 oz spinach

1 cup half-and-half

1 cup Parmesan cheese , shredded

¼ teaspoon salt


Pasta

8 oz farfalle pasta


Caramelize the onions: Heat 1 tablespoon olive oil on medium-high heat in a large skillet. 

Add sliced onions and cook on high heat for about 10 minutes, constantly stirring with the spatula. The onions should be starting to brown. 

Reduce heat to medium and continue cooking the onions for 10 more minutes.  Keep stirring so that onions don't burn.  Add a pinch of salt over onions.

For another 10 minutes continue to cook on medium or low heat.  Stir occasionally so that the onions don't burn and stick to the bottom of the pan.  

The onions should have cooked for 30 minutes.

Remove skillet from the heat and sprinkle onions with a splash of balsamic vinegar to deglaze the pan.

Using a spatula, stir the onions, scraping the bottom of the pan.  Make sure the onions are coated with the balsamic vinegar you have just used. 

Remove these onions and put in a bowl or plate.  Set aside until needed.

Get a pot of water and put on a separate element.  Heat to boiling on high.  This will be for cooking the pasta. I used the back one opposite to what I am using, so that it was out of the way.  I always also turn the handles of my pots away from me, so that I don’t accidentally catch them with an arm.  I know I am preaching to the choir, so to speak, but this is for any new cooks out there.    

Next step, the mushrooms and spinach. 

Heat 1 tablespoon olive oil in the same skillet on medium heat. 

Add sliced mushrooms. 

Sprinkle with a pinch of salt.

Cook mushrooms for about 5 minutes, stirring occasionally until mushrooms are soft.

If the water is boiling at this point, cook the farfalle  pasta according to package directions.  Ours said ten minutes for al dente but we added an extra two minutes to get it to our taste.  It was still al dente.  

When the pasta is cooked, drain thoroughly in a collander.  Put in a bowl and set aside.

Back to the skillet, add the fresh spinach to the mushrooms.  Stir on low heat, just until spinach starts to wilt.

Now make the creamy pasta sauce:

Add half-and-half to the mushroom and spinach mixture and bring to a quick boil. Immediately reduce to a simmer.

Add ⅔ cup of shredded Parmesan cheese and ¼ teaspoon salt. 

Keep stirring on simmer until the cheese melts, which happened almost immediately for us.

Add caramelized onions back to the skillet and mix with the other ingredients.  Make sure the pasta sauce is well combined with the other ingredients.  

Add cooked and drained farfalle pasta to the creamy sauce. Stir on low heat for a couple of minutes to reheat, and to evenly distribute.

Julia's suggestion: if the sauce is too thick, add a small amount of half-and-half to thin it out. If it is too thin, add a small amount of shredded Parmesan cheese, and stir it in, while the sauce simmers.

Serve with additional shredded Parmesan cheese sprinkled on the top.

Julia's useful notes can be read in the original recipe.  

Substitute for half-and-half:  

Use ½ cup of heavy cream + ½ cup of milk instead of 1 cup of half-and-half.

Denise's notes: 

I had no half and half and no heavy cream, so used 1 cup whole milk.  It still tasted very creamy.

Make-ahead tips:  

Also from Julia's Album, you can make caramelized onions ahead of time, refrigerate them in an air-tight container, and use within the next 3 days.  (I will do this next time, making this meal even easier to prepare.)

You can also freeze caramelized onions for up to 2 months and thaw them whenever you need them.

I also enjoyed our host's information on this pasta which reads as follows:

"Farfalle is a bow-tie shaped Italian pasta. Farfalle pasta can also be described as butterfly-shaped pasta. In fact, "farfalle" means "butterflies" in Italian.

Farfalle dates back to the 16th century in Lombardia and Emilia-Romagna Regions in Northern Italy.

Farfalle is often used with cream sauces and in tomato-based sauces.  It is also popular in salads."

If you prefer to cut and paste the recipe, I have left the whole address below.

https://juliasalbum.com/farfalle-with-spinach-mushrooms-caramelized-onions/


Very happy with this. We liked that it was meatless, which we are trying more of lately.  It would go well with chicken or seafood, but it was such a comforting and filling meal, we didn't miss it.  

There are also leftovers for tomorrow.  

Thank you Julia's Album for a delicious meal which has gone into our make-again folder.

Thanks for looking, and
have a great week!


Monday, October 4, 2021

MONDAY RECIPE POST - QUINOA-VEGGIE BOWL FOR ONE

I have no recipe link for this one.  It was basically using what I had in the fridge and pantry.  I have seen similar recipes here and there that no doubt put the idea into my head, and it all came together to suit my own taste.  My dear other half was out of the house for the day and I knew what I was fixing myself for lunch.


1 cup uncooked Quinoa 

2 cups water

1 container fresh mushrooms (even though I only used 1/4 cup for this recipe, I cooked them all and used what was left in our next meal)

1 tablespoon butter

1/4 cup canned sliced potatoes

1/4 cup canned black beans

1/4 cup canned diced tomatoes

1 tablespoon Chili Crisp


Start preheating a frying pan on medium hot.

Put 2 cups of water in a separate pot and heat on high until water is boiling.  Carefully pour in the quinoa, give it a stir, cover and lower heat to a simmer. Cook according to package directions (mine said 12 minutes).  

Slice the mushrooms and put in the previously heated non-stick frying pan (medium hot).  Stir them around a bit and then carefully pour a cup of water over the mushrooms (it should be on a low simmer. Do be careful so as not to splash when putting water into the pan).  Cover and cook for about 10 minutes.  Check in the middle of cooking to see that the water hasn’t evaporate, and add a little more if needed.

After the ten minutes, and if there is any water left in the pan, turn the heat up a little until the water disappears.   

If you find the mushrooms burning instead of caramelizing, turn heat down using your own judgement.  (I add the water to use less fat when cooking, but if you don't mind adding extra butter, leave the water step out and just sauté them all in more butter until done.)

You will melt the tablespoon of butter in the same pan, and stir the mushrooms until coated.  

Add the other veggies and beans giving them enough time to heat through. 

Add the cooked quinoa (which should still be warm) and mix with the veggies and beans until combined.

Next add the tablespoon of Chili Crisp and mix in until combined.


If you like grains this was a very tasty lunch.  The ingredients are only a guideline and you can use any favorite.  

Next time I would probably add a green vegetable for more color, fresh diced tomato or a sweet red pepper.  Also a garnish of sliced green onions, or parsley, or cilantro would be nice.

Any leftover ingredients from the cans went into our mixed green salad at dinner time, along with a handful of chopped walnuts.  Come to think of it, walnuts would also have been a nice addition to this recipe.

There was enough quinoa left for two more meals and at other times I have measured 1-cup portions for the freezer.

The Chili Crisp was only enough to the mix to be very flavorful and wasn’t that hot (I don’t usually eat things too hot and spicy), but you can add more to taste, or leave that out entirely and add one of your own flavorings if you prefer.  

In the photo those are slices of potato on the top.  They had been bought by mistake and I wanted a way of using them up. They were quite good with everything else.

I am not a proper recipe writer so if there is anything confusing, please let me know in the comments.

Thanks for looking and enjoy your week.


Monday, November 30, 2020

MONDAY RECIPE POST - CREAM OF MUSHROOM SOUP FROM SCRATCH

I found my recipe at Cafe Delites hosted by Karina.  The link is here.  I would like to thank Karina for a great tasting soup.

A first-class replacement for the canned variety by the way.  We both gave this soup a 10 out of 10.

Serves: 6

Calories: 271 per serving


4 tablespoons butter

1 tablespoon oil

2 onions, diced

4 cloves garlic, minced

1 1/2 pounds (750 g) fresh brown mushrooms, sliced

4 teaspoons chopped thyme, divided

1/2 cup Marsala wine (any dry red or white wine)

6 tablespoons all-purpose flour

4 cups low sodium chicken broth or stock

1-2 teaspoons salt, adjust to taste

1/2-1 teaspoon black cracked pepper, adjust to taste

2 beef bouillon cubes, crumbled

1 cup heavy cream or half and half (evaporated milk can be substituted)

Chopped fresh parsley and thyme for garnish


Heat butter and oil in a large pot over medium-high heat until melted. Sauté onion for 2 to 3 minutes until softened.

Next add garlic and cook until fragrant, about 1 minute.

Add mushrooms and 2 teaspoons thyme, cook for 5 minutes. Pour in wine and cook for 3 minutes.

Sprinkle mushrooms with flour, mix well and cook for 2 minutes. Add stock, mix again and bring to a boil. Reduce heat to low-medium heat, season with salt, pepper and crumbled bouillon cubes.

Cover and allow to simmer for 10-15 minutes, while occasionally stirring, until thickened.

Reduce heat to low, stir in cream or half and half. Allow to gently simmer (do not boil). Adjust salt and pepper to your taste.

Mix in parsley and remaining thyme. 

Serve warm. 

I read a lot of comments underneath the original recipe at Cafe Delites, and got some great ideas.  I highly recommend going to the original to read those.  Also for more information at the beginning from its host.

I was looking for a replacement to a chicken pie recipe I am making, which calls for 2 cans of cream of mushroom soup.  As I did not have the canned and like the idea of making something from scratch, I found this one.

Changes made because of what was in the pantry:

I used 1 teaspoon of garlic powder instead of the four garlic cloves

Also 1 teaspoon of dried thyme instead of the 4 teaspoons of chopped fresh thyme, or to taste  

White mushrooms instead of brown.

Instead of the Marsala wine we had a bottle of Beringer's White Zinfandel.  This is a wine we both enjoy occasionally.

No fresh parsley to garnish but used plenty of black pepper to sprinkle over.

Instead of the bouillon cubes which I did not have, I used a tablespoon of HP Brown Sauce.  It is like A1 steak sauce here.

If I couldn't find HP I would use A1, which was my next choice except that it was way in the back behind loads of other items, and I put my hands on the HP first.  You could also use Worcestershire Sauce.

If I knew ahead of time that I was going to make this recipe, I would probably get all fresh herbs, but the dried worked just fine.  I would probably have a lot more flavor if I used fresh.  But honestly?  This was one of the best mushroom soups - for both our tastes - that we have ever come across, and will most definitely be making it again.

Apparently you can freeze it.  Another commenter mentioned that it looks curdled when it is thawed, but heats up well.  I am wondering, as I read from another commenter, if you added the dairy after thawing the soup, this might stop the curdled look. I would add the cream when the soup is heating up on a medium-low heat   

I used 2% milk and the soup was still very creamy tasting.

I like to read the comment section afterwards, and saw a lot of interesting tips on there.  

Someone said they would use this soup as a gravy at Thanksgiving. Another said they would put it into the green bean casserole instead of using the canned variety.  I make green bean casserole every time for Thanksgiving, and I can see doing this.   I can also see using it as a gravy.  We also thought this would be delicious over rice or noodles or mashed potatoes.

There were a lot of different ideas that you might enjoy tailoring to your own taste.  These were a few of them.

I served this with a crusty bread which I sliced and toasted.

Thanks for taking the time to visit, and I hope your week is a great one.


Monday, August 24, 2020

MONDAY RECIPE POST - MASHED SWEET POTATOES

I saw this recipe at For The Love of Cooking hosted by Pam.  Thank you Pam, this has become a favorite.  I discovered this particular recipe several years ago and have made it many times since.  You can click on the red lettering above to view the original.  You can also click here to see more of Pam's delicious recipes.
Mashed Sweet Potatoes - 6 servings

Preparation time: 10 minutes
Cooking time:      15 to 20 minutes

3 large sweet potatoes, peeled and cut into pieces
1/4 cup milk (I use 2%)
1 to 2 tablespoons butter, or to taste
Sea salt and freshly cracked ground pepper, to taste
Freshly grated nutmeg, to taste

Put the sweet potatoes in a large pot, and add just enough cold water to cover them.

Bring to a boil and cook until tender, about 15 minutes.

Place milk, butter, sea salt, freshly cracked pepper and nutmeg in a glass bowl.  Put in the microwave for 30 seconds, or until warmed.

Drain and return the potatoes to the pot and place on the stove with the burner turned on low, which will dry up any excess water.  

Add the warmed milk mixture and mash with a hand mixer or beater until smooth.  Taste and add more salt or nutmeg if needed.  

Serve immediately and enjoy.


It is a keeper. I am the only one who likes sweet potatoes and usually have several servings left when I make it.  If you have been following my recipe posts, you will know I love to use my freezer.  I froze any leftovers in 1 cup portions. 


Monday, July 13, 2020

MONDAY RECIPE POST - CRUSTLESS TOMATO PIE


I have made a similar tomato pie but it has been a while.  At one time Quiche Lorraine was always a favorite of ours. This is a similar idea without the crust. I found it at Biscuits & Burlap hosted by mother and daughter, Sara and Pam. The original recipe is at this link.  I like looking at their pretty food photos which helps me decide which dish to try.  I look for a recipe we both like, and more often than not hubs does all the prep work, while I read the instructions at the kitchen table.  

Crustless Tomato Pie - 8 servings

4 tomatoes, sliced
1-2 teaspoons salt
1 tablespoon butter
1/2 cup onion chopped
1 clove garlic minced
1/2 teaspoon black pepper
2 tablespoons fresh oregano, chopped 
6-7 leaves basil chopped
2 cups Mozzarella cheese, shredded, plus extra for sprinkling over top
2 eggs, beaten


Slice tomatoes and lay sliced on plates. Sprinkle lightly with salt and let sit at least 10-20 minutes, and up to 30 minutes.

Melt butter in small skillet over medium-high heat. 

Add onion and garlic.  Sauté until onions are soft (about 8 minutes). Transfer to a medium-sized bowl.

Add cheese, eggs, herbs, and pepper to bowl. Stir to combine. 

Drain water off the plate with tomatoes.  With a paper towel gently blot tomatoes to soak up excess moisture.

Arrange tomatoes in a single layer on a greased pie pan.

Top with about 1/4 cup of the cheese mixture.

Repeat until all ingredients have been used, finishing with a layer of tomatoes.

Top this layer with a sprinkle of mozzarella cheese.  

Bake at 375 degrees for 30-40 minutes, or until edges are lightly browned. 

Allow to sit 5-7 minutes before serving.

In my first picture at the start of this recipe, for a side I fixed a simple green salad using butter lettuce and diced avocado.  The pie fell apart when I transferred a slice to the plate.  It didn't look as pretty as the one in the photos on the website, but it was delicious none the less.  

The next night we made our tried and true Mashed Potato and Cauliflower Gratin, which you can find here.  It is our favorite potato dish at the moment and we found it paired very nicely with the tomato pie.  

I also put a tablespoon of chutney on the side.  That went very well with the pie. The photo below is the kind we always get.  This was a staple in my family when growing up. We both love it and it is found in the British aisle at our local supermarket.  
This was a "it is time to use up what we have in the fridge and vegetable/fruit bowl" meal, before the next grocery run.  I didn't have any fresh herbs and some overly-industrious (where did all that energy come from?) person (me) cleaned her kitchen from top to bottom, which included the herb cupboard because when she looked at the expiration dates she realized many were way past time.  Just salt and pepper in this dish.  

I added the last two green onions to the sweet yellow onions.  

There was no mozzarella cheese.  It was replaced with cheddar.

Even without the original ingredients this was a very tasty dish.

My thanks to the hosts of Biscuits and Burlap, another great food blog with lots of excellent recipes.


Sunday, February 9, 2020

MONDAY RECIPE POST - ROASTED CAULIFLOWER AND EGG SKILLET


It has been a while since we ordered a Blue Apron meal, but it arrived on the doorstep early this morning, and by dinnertime we tried the following meal.  It was different but in a good way.
(picture taken before Parsley and Parmesan was sprinkled on the top)


Roasted Cauliflower and Egg Skillet, with Hot Sauce and Cheddar Cheese

Done in 40 minutes
2 servings
Calories: 370 calories per serving.  

A stovetop dish where you create two wells in the cooked vegetables, and place an egg in each towards the end of the cooking process.

Roasted Cauliflower and Egg Skillet, with Hot Sauce and Cheddar Cheese

2 large eggs
1 head cauliflower
2 cloves of garlic
4 ozs. Sweet Peppers 
1 yellow onion
1 bunch of parsley
2 ozs. white cheddar cheese
1 tablespoon of hot sauce
1/4 cup grated Parmesan Cheese  
1 tablespoon of spice blend which comes in 1 small packet.  (The ingredients are onion powder, garlic powder, smoked paprika and whole dried parsley.  You be the judge and mix to your own taste.)

Prepare and roast the cauliflower:

Place an oven rack in the center of the oven, then preheat to 450 degrees. F.

Wash and dry the fresh produce.

Cut out and discard the core of the cauliflower.  Cut into small florets.

Place on a sheet pan; drizzle with olive oil and season with salt, pepper and the spice blend.

Toss to coat and arrange in an even layer.

Roast for 21 to 23 minutes, or until brownded and tender when pierced with a fork.  

Remove from the oven.

Prepare the remaining ingredients:

Meanwhile, halve, peel and medium dice the onion.

Peel and roughly chop 2 cloves of garlic.

Cut off and discard the stems of the peppers; remove the cores, then medium dice.

Grate the Cheddar on the large side of a box grater.

Roughly chop the parsley leaves and stems.  

Once the cauliflower has roasted about 20 minutes, in a large pan (non-stick if you have one), heat a drizzle of olive oil on medium-high until hot.

Add the diced onion and chopped garlic.  Season with salt and pepper.

Cook stirring occasionally for 3 to 4 minutes, or until slightly softened.

Add the diced peppers; season with salt and pepper.

Cook, stirring occasionally, 3 to 4 minutes, or until softened.

Add the roasted cauliflower.  Cook stirring occasionally for 1 to 2 minutes, or until combined.

Finish the skillet and serve your dish:

Using a spoon, create 2 shallow wells in the center of the cooked vegetables.

Crack an egg into each well and season with salt and pepper.

Evenly top the eggs with the grated Cheddar cheese.

Loosely cover the pan with foil and cook for 3 to 5 minutes, or until the egg whites are set and the yolks are cooked to your desired degree of doneness.  (We said next time we would cook our eggs for 4 minutes.)

Turn off the heat.

Carefully remove the foil and let cool at least 2 minutes.

Serve the finished skillet garnished with the chopped Parsley, Parmesan and as much of the hot sauce as you would like, depending on how spicy you would like the dish to be.

Enjoy!  

We were both surprised how much we liked this meal.  Apart from cooking our eggs four minutes instead of five, we wouldn't change anything.

The cauliflower was roasted very nicely.  Also for the first time a orange-ish cauliflower was supplied by Blue Apron.  I have seen them in the stores, but always stuck to the regular white cauliflower (still need to let my adventurous spirit fly free at times).  Blue Apron guides you to 'think outside the box', and I am beginning to enjoy trying new things.

Thanks for looking, have a great week and ...


Sunday, January 26, 2020

MONDAY RECIPE POST - CRISPY PEANUT TOFU AND CAULIFLOWER 'RICE' STIR-FRY


I have been looking for meatless meals to put into our weekly meal plan.  As we are both Thai food fans, I chose this one.  

We found the meal at Minimalist Baker at this link, hosted by Dana.  I recommend reading her information and advice while making this recipe.  She also has a great food blog with many delicious recipes.  Thank you Dana for adding to our list of favorite meals.


Crispy Peanut Tofu and Cauliflower Rice Stir-Fry

The tofu is baked not fried, served over cauliflower rice with sautéed vegetables.

Preparation time: 30 minutes
Cooking time: 1 hour 30 minutes
Serves 2
Freezer: sauce only, nothing else

Ingredients:

Stir-fry:

12 ounces extra firm tofu (organic and non-GMO if possible)
1 tablespoon toasted sesame oil
1 small head cauliflower

2 cloves garlic (minced - 2 cloves yields 1 tablespoon or 6 g)

Sauce:

1-1/2 tablespoons toasted sesame oil
1/4 cup low sodium soy sauce (tamari for gluten free eaters)
1/4 cup light brown sugar (or honey if not vegan)
1/2 teaspoon chili garlic sauce
2-1/2 tablespoons peanut butter or almond butter (natural, salted)

Optional extras:

Vegetables: baby bok choy, green onion, red pepper, broccoli

Toppings: fresh lime juice, cilantro or Thai basil, sriracha

Instructions:

First step, drain tofu for 1-1/2 hours before you serve up your meal.  The instructions say that if your block of tofu is larger than 12 ounces, trim it down, that you don't need a full pound for this recipe, though truthfully we added the whole 16 ounces.

Roll tofu in a clean, absorbent towel several times, and then place something heavy on top to press.  Our blog host used a pot on top of a cutting board, and occasionally added something to the pot to add more weight.  Do this for about 15 minutes.

Near the end of draining, preheat oven to 400 degrees F. (204 C.) and cube tofu.  Place on a parchment-lined baking sheet (I used non-stick aluminum foil) and arrange in a single layer.  Bake for 25 minutes to dry/firm the tofu.  Once baked, remove from the oven and let cool.

Prepare sauce by whisking together ingredients until combined.  Taste and adjust flavor if needed.  Our blog host often adds a little more sweetener and peanut butter (we felt it was fine without the extras.)

Add cooled tofu to the sauce and stir to coat.  Marinate for at least 15 minutes to saturate the tofu and infuse the flavor.

In the meantime shred cauliflower into 'rice' by using a large grater or food processor.  You don't want it to be too fine, just somewhere close to the texture of rice.  Set aside.

Mince garlic if you haven't already done so, and prepare any vegetables you want to add to the dish (this is optional).

Heat a large skillet over medium to medium-high heat, and if adding any vegetables to your dish, cook them now in a drizzle of sesame oil and a dash of soy sauce.  Remove from pan and set aside.  Cover to keep warm.

Using a slotted spoon, put the tofu into preheated pan.   Drizzle a few spoons of sauce to coat.  Cook, stirring frequently for a few minutes until browned.  It will stick to the pan a bit, but don't worry.  Remove from the pan and set aside.  Cover to keep warm.

Rinse your pan under very hot water and scrape away any residue.  Place back on oven top.  Add a drizzle of sesame oil to the pan, then add garlic and cauliflower rice and stir.  Put cover on to steam the 'rice'.  Cook for about 5-8 minutes until slightly browned and tender, stirring occasionally.  Next add a few spoons of sauce to season and stir.

In two individual plates or bowls, divide equally the cauliflower rice, top with your vegetables and tofu.  Serve with any leftover sauce.  

Leftovers reheat well and will keep covered in the fridge for up to two days.  

This is approximately 524 calories per serving.  

What did we think?  Delicious!  Not much here that we would change.  We enjoyed it just as the recipe said.

There were leftovers for the next day and as often happens, the meal tasted even better.