Showing posts with label Cauliflower. Show all posts

Monday, June 3, 2024

A BLOG BREAK - MONDAY MORNING RECIPE POST - CREAMY CAULIFLOWER AU GRATIN

Hello Dear Friends, it has been a while but I am taking a blog break. I hope to be back in a couple weeks.
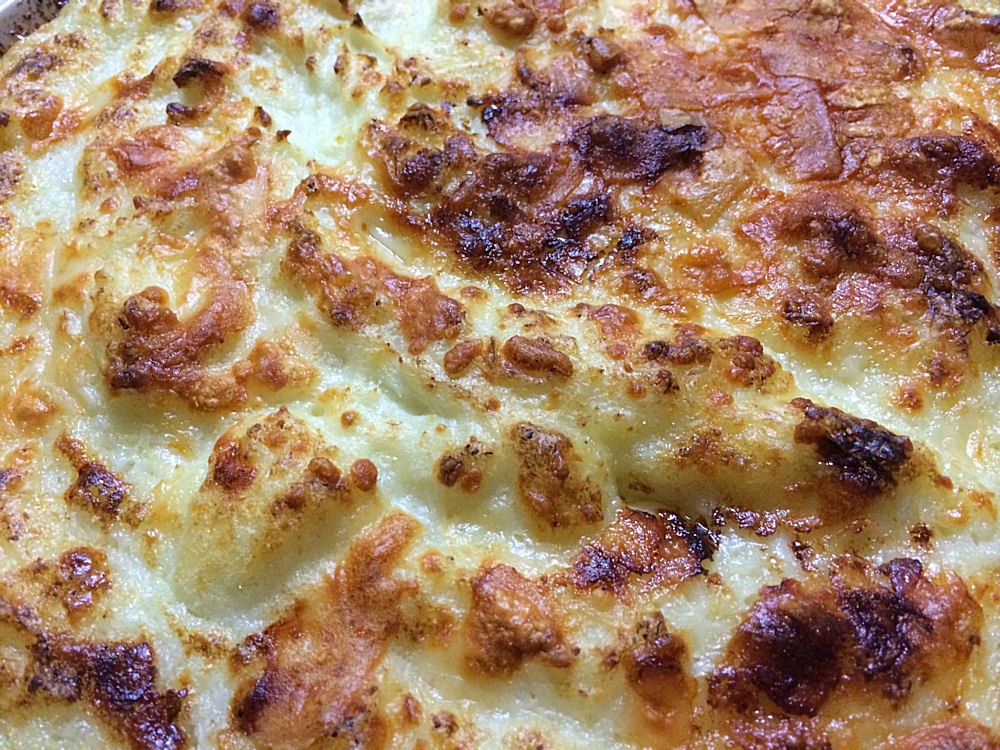
My photos for this recipe didn’t turn out very well. At the end of the cooking time I decided to put it under the broiler to give it a nice golden brown color.  Unfortunately, I got distracted and forgot!  It wasn’t too long past what I intended but it got a bit burnt in parts, which I tried to rescue by scraping said burnt bits off the top. Fortunately it didn’t detract from the taste and was actually a delicious tasting recipe.  But!!! I must remember to ‘babysit’ next time, and not leave it to fend for itself. Even with all this being said, we gave it a 10 out of 10.

The recipe comes from Laughing Spatula hosted by Kathi and Rachel. It is an Ina Garten recipe and they increased the amount of cheese sauce and cauliflower for a bigger casserole.You can see theirs at this link. Their recipe index can be found here. Ina's recipe is at the Food Network website here. I always recommend going to the food blog where I find my recipes. Always fun to look through them for others and also to see the great photos for this one, plus the tips. Also suggestions as to what main course would go well as an accompaniment.


Creamy Cauliflower Au Gratin

Servings: 8

Calories:  268 per serving


8 cups cauliflower florets about 3 pounds

4 tablespoons butter

1/3 cup flour

3 cups milk 2 percent or whole

1 cup Gruyere cheese, grated Swiss is a great substitute

1/2 teaspoon salt

1/4 teaspoon pepper

1/4 teaspoon nutmeg


For Topping:

1/2 cup panko crumbs regular bread crumbs would work too

1/3 cup Gruyere cheese, grated

1 tablespoon butter, melted


Preheat oven to 375 degrees.

Separate cauliflower into florets and either steam for 5 minutes or boil in large pot of water for 5 minutes, until just barely tender. Drain and set aside.

In sauce pan, melt 4 tablespoons of butter. Add 1/3 cup of flour and whisk until smooth and mixture is bubbling.

Add milk and continue to stir until thickened. Add one cup of gruyere cheese, salt, pepper and nutmeg. Stir until melted. Sauce should cover the back of a spoon.

Pour 1/3 of the sauce into an au gratin baking dish or baking dish about that same size.We used a 9 x 13 inch baking dish but a10 x 10 was suggested. If using the 9 x 13 the casserole will be a bit thinner.

Place partly cooked cauliflower on top. Sprinkle with salt.

Pour remaining sauce on top of second layer of cauliflower.

For Topping: combine melted butter, gruyere and bread crumbs in small bowl. Sprinkle on top of cauliflower.

Bake for 30 minutes or until top is crispy and cauliflower is tender.


Notes

Substitute swiss cheese or any other big flavored cheese in place of gruyere.

Do not use fat free milk. Whole milk is best.  2% in a pinch. (Denise: I always use 2% and it still tastes creamy enough for us.)

Par cook the cauliflower until just barely fork tender, careful not to over cook.


Some of the comments asked at the end of the recipe I found interesting. 

1) Can you use coconut milk.The answer was yes, it would thicken up just like regular milk.

2) Can you make the day before and reheat? Yes and for best results assemble, cover and refrigerate, then bake next day if possible.

3) Can you use frozen cauliflower or would that be too mushy? That answer was yes, it would be mushy, but still delicious, only with more of a mashed potato consistency.

4) One commenter's store didn't have Gruyère cheese, so they used a good quality sharp Cheddar cheese. Also they were only cooking for one so used 1/2 the measurements. She loved the recipe. (Denise’s note: the only cheese I ever used before Gruyère was Cheddar. Always delicious! I did enjoy the creamy taste of the Gruyère however.)

This is a recipe I remember making at school in my Domestic Science Class. I took it home afterwards for my family, and happy to say it was a big success. It became a regular one from then on and my dear mother was very happy as it was the start of me helping her with making dinners. She appreciated the extra hands.

Laughing Spatula's website for this recipe can be found here:

https://laughingspatula.com/creamy-cauliflower-au-gratin/


Ina Garten's recipe can be found at Food Network here:

https://www.foodnetwork.com/recipes/ina-garten/cauliflower-gratin-recipe-1917463

Blog hostess note: Would pair great with a baked ham or a roast chicken!  

Denise’s note: My protein part of the meal was already cooked and frozen lobster cakes from Trader Joe. There were two in one package, one for each of us, and at first my dear other half wasn’t too keen. I wasn’t so sure either but wanted to try one time for something special, but easy, on Memorial Day. (It was just the two of us.) However, as they were small cakes, I persuaded him to try at least one time. I was very happy when he said he enjoyed them so much, that he would definitely have them again.

An already cooked rotisserie chicken from your favorite supermarket would be a wonderful and easy addition, not to mention a faster prep time in the kitchen. In fact, for the second night’s meal, we bought one from CostCo.  We always enjoy theirs.  

I added a mixed green salad.  

Instead of using store-bought panko crumbs, I had a large-ish heel of sourdough bread left, broke it into pieces and put into a blender. I whirled it long enough to make into breadcrumbs, and followed the recipe from there.

There were leftovers for two more meals. At dinner the next day it tasted even better. We still had leftovers after the second time, smaller portions this time for a light snack.

Blog host’s final note: You want the cauliflower just slightly fork tender. Careful not to over cook so you don’t have cauliflower mush casserole. Would still taste good…just mushy.


Monday, February 7, 2022

MONDAY RECIPE POST - CREAMY ROASTED CAULIFLOWER SOUP - VEGETARIAN

I found this week's recipe at Eating Well, and the original recipe was shared by Melissa Gray, which you can see here.  

My photo came out blurry and I will replace it when we make this dish again.  Melissa's photos are at the previous link.  

Thank you Melissa!  I thought this was going to be one of those change-of-pace soups, one we would enjoy but did not expect to give this a 10 out of 10.  For us, adding the lemon juice at the end of the meal was key.  Also, we changed a couple of things to suit our own taste, which I have mentioned.

This soup is egg free, gluten free, soy-free and vegetarian.


Creamy Roasted Cauliflower Soup

Servings: 4 servings 

Calories per serving: 246 


Nutritional Profile:

You can see an entire list of nutritional values at the end of Melissa's recipe here.  Just scroll down to the bottom of her recipe.

We changed a few things.  We are not cumin fans and left that ingredient out.  We also exchanged fresh oregano for fresh cilantro.


1 medium head cauliflower, cut into flowerets

2 large shallots, halved lengthwise

6 cloves garlic, smashed

½ teaspoon ground cumin (this is something we left out)

3 tablespoons extra-virgin olive oil, divided

½ teaspoon salt, divided

4 cups low sodium vegetable broth, warmed

2 tablespoons unsalted butter, melted

1 tablespoon lemon juice

2 tablespoon pine nuts or sliced almonds, toasted (we used the sliced almonds)

Crushed red pepper and chopped fresh oregano (we used cilantro) for garnish


Preheat oven to 425°F. 

Combine cauliflower, shallots, garlic, cumin (if using), 2 tablespoons oil and 1/4 teaspoon salt on a large rimmed baking sheet; toss until fully coated. 

Spread in an even layer. 

Roast for 15 minutes; remove and discard garlic. 

Stir the vegetables and continue roasting until caramelized and tender, about 10 minutes more.

Reserve 1/2 cup roasted cauliflower florets for garnish. 

Working in batches, combine the remaining cauliflower mixture, warm broth and butter in a blender (use caution when blending hot liquids). Secure the lid on the blender and remove the center piece to allow steam to escape; place a clean towel over the opening. Process until smooth, about 30 seconds. Transfer the mixture to a large saucepan. 

*Denise’s note: The following is the method I used.

Alternatively, combine the cauliflower mixture, warmed broth and butter in a large saucepan. Using an immersion blender, process until smooth, 5 to 7 minutes.*

Bring the soup to a simmer over medium-low heat, stirring occasionally. Remove from heat; stir in lemon juice and the remaining 1/4 teaspoon salt.

Divide evenly among 4 bowls; top with the reserved cauliflower florets and sprinkle with pine nuts (or almonds). 

Drizzle with the remaining 1 tablespoon oil. 

Garnish with crushed red pepper and chopped fresh oregano (or cilantro). 


To make ahead:

Refrigerator: when you have made this soup, (do not add the garnishes), you can refrigerate for up to 5 days.  Let it cool a little first as it will be very hot. 

I may be preaching to the choir, but this is a reminder for myself and also for others who are new to cooking out there.  A large pot or container of food that is hot should not be placed in the refrigerator or freezer. The hot food can raise the temperature inside the refrigerator/freezer, which can be a risk for food already stored.  There are all kinds of safety tips at this link for storing food.

To freeze, allow the soup to cool and put in freezer in air-tight container for up to 2 months. 

For both methods, reheat and add garnishes when ready to serve.


My last note for this recipe is that it came out a rather thin soup, not like the one in Melissa's photo.  Perhaps this was because she used the blender and we used the immersion blender?  Don't have a clue.  This did not detract from a delicious result, and the lemon juice added towards the end was definitely a big plus (for us).  

Gregg thought adding sour cream to this soup at the table would be a nice addition.


Thanks for looking and have a great week!


Monday, January 31, 2022

MONDAY RECIPE POST - OVEN-ROASTED PORK LOIN WITH HERBS

We have made a couple of old favorites this week, Chicken and Dumplings and Cheesy Cheddar Chowder.  If you click on their names, I have provided a link to each recipe.  There were leftovers and we ate each dish for two or three days.  Therefore, I didn't make a new recipe for today, but found an old menu to share from my old blog.  


Oven-Roasted Pork Loin with Herbs


I found this recipe at "Best Recipe Box" in October 2013. Unfortunately, when I did a search for the link I used originally, there wasn’t one.  I found the blog but not the recipe.  There were other pork recipes available but not this one, unless I missed it somehow.


Oven Roast Pork Loin Roast with Herbs - serves 4 to 6

Times may vary depending on your oven temperatures. A meat thermometer put in the thickest part of the meat should reach 145 degrees F.  Your roast should be done but the suggestion was not to go past 145 as the roast will start to get rather dry.

2 pounds pork loin roast
2 tablespoons vegetable oil
3 cloves garlic, minced
1 teaspoon yellow mustard
2 tablespoons Worcestershire sauce
6 tablespoons unsalted butter
1 tablespoon dried herb mix (basil, oregano and/or thyme)
Kosher or sea salt, to taste
Fresh cracked black pepper, to taste

3 medium to large potatoes, peeled, cut into large pieces


Preheat oven to 350 degrees.

(Add potatoes to a saucepan, lightly salt and bring water to a boil.  Par-boil for at least 10 minutes.  Drain and surround the pork roast with the potatoes.  Add them the last hour of cooking and turn half-way.  Baste with the pan juices at the same time as you baste the meat. They had a lovely flavor.)

Rinse and pat dry pork loin and then season with salt and pepper.

Heat a large oven-safe skillet on medium-high heat.

Add oil and heat for about 1 minute.

Sear the pork loin on all sides until a crust forms, about 1 minute per side.

Remove pork loin from the pan and set aside.

In the same hot pan add the butter, garlic, Worcestershire sauce and mustard.

Stir and cook the sauce until the butter is completely melted, then remove from heat.

Coat the pork loin with your mixture of dried herbs by patting all over the pork roast.  

Place the pork back into the skillet (along with the potatoes) and spoon sauce over the pork loin and the potatoes.

Cover with foil and transfer to the oven for 30 minutes.  

Remove the foil, spoon some more sauce over pork and potatoes, turning the potatoes at the same time so that they are well coated.  Cook for about another 30 minutes, or until the internal temperature of pork reaches 145 degrees.

Remove from the oven and cover with foil to keep warm.  Let rest for about 15 minutes.

Slice thin and serve hot.

We enjoyed this very much and there were leftovers.  The next night we had it again.  There were a few potatoes left over also but we sauteed them in the morning and had them as part of our breakfast.  To replace them for our evening meal I made cauliflower cheese, which I served with the peas, also left over, and the pork roast. 

To me, Cauliflower Cheese is very much a nostalgia food from childhood. I have my own recipe but am always looking to trying something new. I found the recipe at Smitten Kitchen.  Fortunately the link still works and you can see the original recipe here.  It was very close to my Mother's recipe and my dear other half enjoyed it very much also.

Cauliflower Cheese - makes 4 side dishes

1 medium head (about 2 to 2-1/4 pounds) cauliflower
4 tablespoons unsalted butter
4 tablespoons all-purpose flour
2 teaspoons mustard powder
Salt to taste
Freshly ground pepper
2 cups milk (I used low-fat and this dish still tasted very creamy)
1-1/4 cup, plus 2 tablespoons extra sharp, grated cheddar cheese
Parsley for garnish, chopped

Heat the oven to 400 degrees F.

Trim the cauliflower and remove the core. Cut into 1 to 2 inch florets.

Steam in a saucepan for about ten minutes, or par-boil six to seven minutes until firm but tender.

Drain thoroughly to get rid of as much moister off the cauliflower as possible. Put it into the casserole that you are using to put in the oven and set aside. The casserole should be a 2-quart oven-proof baking dish.

Meanwhile in a medium saucepan melt the butter over medium-high heat.

Add the flour and whisk to combine; cook for 1 minute while stirring. You want to get rid of that uncooked flour taste.

Add mustard powder and a pinch of black pepper, stir to combine.

Drizzle milk in a little at a time, whisking gently to get rid of any lumps. Keep adding a little at a time and repeat whisking until all the milk is in the pan and the sauce is smooth.  

Season with salt and bring mixture to the point where you can see a bubble or two on the surface, but don't bring to a rolling boil.  Keep stirring so as not to burn the bottom of the sauce.  If it seems to be sticking at the bottom of the pan, turn it down a little and keep stirring. The mixture should be thickening by now.

Stir in 1-1/4 cups of cheese, a handful at a time. Wait for the cheese to melt before you add the next handful.  It won't take long.

Taste carefully and adjust seasonings if necessary.

Spoon the sauce over the cauliflower and sprinkle with the remaining 2 tablespoons cheese.

Bake for about 30 minutes or until there is a nice golden brown on top of your Cauliflower Cheese.  I sometimes turn the broiler on for the last couple of minutes, but watch it very carefully so that it doesn't burn.


What did we think of this menu?  Delicious!  Both the Pork roast and the Cauliflower Cheese recipes will be used again.  My thanks to Best Recipe Box and to Smitten Kitten for two great dishes.  

I used sage and thyme for my herb mix for the roast.

I also line the roasting pan with heavy foil.  This makes clean up a snap.

The second night was just as delicious as the first.

The Cauliflower Cheese and the peas were a perfect accompaniment to the roast and we didn't miss the potatoes.

We have yet more leftovers, enough pork for sandwiches for lunch and the Cauliflower Cheese will make a nice light supper.


Thanks for looking, enjoy your day and...


Monday, February 22, 2021

MONDAY RECIPE POST - VEGAN CAULIFLOWER SOUP

I wanted to do a vegan meal this week and we had a cauliflower in the fridge.  When looking for a recipe we would both enjoy, I put vegan and cauliflower soup in the subject line - because we always want to make soup.  Several good recipes popped up but this one was the one that spoke to both of us that day.  I found it at Loving It Vegan hosted by Alison.  Thank you Alison!  

She has a lot of good tips about this dish, which are a big help when making it, and I always enjoy the professional looking photos of the meals.  Her recipes looked very yummy, enough to interest the vegan obviously but also the non-vegan.  For us we are interested in putting more meatless meals into our weekly menu, and this one was a definite winner.


Vegan Cauliflower Soup - serves 4 to 6

This recipe comes together fast, and tastes very creamy.  


1 tablespoon olive oil 

1 onion, chopped

1 teaspoon crushed garlic

1 teaspoon dried thyme 

1/2 teaspoon dried rosemary

1 large head cauliflower, chopped

2 cups (480ml) vegetable stock

1 14oz (400ml) can Coconut Milk

Salt and Pepper, to taste 


Add the olive oil, onion, crushed garlic, thyme and rosemary to your soup pot.  Sauté until the onions are softened.

Add the cauliflower and combine thoroughly. Then add the vegetable stock and coconut milk. Bring to a boil. Turn down the heat, cover the pot and simmer until the cauliflower is softened.

Take off the heat, and carefully use your immersion blender until smooth. If you don’t have an immersion blender, you can pour soup into your blender in stages and blend until smooth.   

Add salt and pepper if needed.

Serve with a sprinkle of ground black pepper and a sprig of fresh thyme. 

One portion has 186 calories, presumably if you are serving six people and not four.


From Alison: 

"Leftovers keep very well in the fridge for three to four days days and can be reheated either on the stovetop or in the microwave as needed. 

This soup is also freezer friendly, just allow it to cool completely before freezing. Thaw overnight in the fridge before reheating and serving."


What did we think of this soup?  Delicious!  

This is a very mild flavored but tasty soup.  You can always add at the table after serving up.  Gregg chose a tablespoon of sour cream, also Siracha and Thai sweet chili paste, which he mixed in. 

Towards the end of the cooking we added a handful of Cilantro roughly chopped.  

We're thinking corn would be a nice addition to this soup, cream-style or regular.  

Another vegetable I like the idea of is sliced mushrooms which I would sauté with the other vegetables at the beginning of this recipe.  You could probably add a lot of your favorites.

When I came to use my immersion blender, which I have had for many years, it chose this time to stop working.  Instead of using the blender, which we have done for other soup recipes, we got a potato masher and mashed the veggies really well.  It made it a more chunkier soup but was still very creamy and delicious.  

We both gave this soup a ten out of ten.  Thanks again Alison!


And thank you all for stopping by.  I hope your week is a great one.


Monday, April 6, 2020

MONDAY RECIPE POST - MASHED POTATO AND CAULIFLOWER GRATIN


I haven't made any new recipes lately, just ones we have done a lot of times before.  All favorites but as ingredients for certain foods are harder to find now, we are sticking with the basics.  Therefore, I'm sharing this one, another old favorite.


Cooking nicely in the oven.  This is before I put the broiler on to brown a little more.
I found this on Epicurious which you can find here. It is part of their Thanksgiving Menu.  I know we have a ways to go before Thanksgiving, but we are not waiting until then to try this dish again.

Mashed Potato and Cauliflower Gratin  
Makes 8 servings
Active time: 1 hour - Total time 2 hours

2 pounds russet (baking) potatoes, peeled and cut into 1-inch pieces
Salt
1-1/4 cups whole milk, divided
1 stick (8 tablespoons) unsalted butter, divided
4 ounces coarsely grated Italian Fontina or Gruyere cheese (about 1 cup packed)
1/4 teaspoon freshly ground black pepper
1 (2 to 2-1/2 pound) head cauliflower, cut into 1-1/2 inch pieces, including stems and core
3 garlic cloves, peeled and smashed
3/4 to 1 cup grated Parmigiano-Reggiano, divided 

Put potatoes and 2 teaspoons salt in a large heavy saucepan, and cover with cold water (about two inches over the top of the potatoes, make sure your pan is large enough to accommodate).  Bring to a boil and cook, partially covered, until potatoes are tender, 15 to 20 minutes.

While potatoes are boiling, heat 3/4 cup milk and 3 tablespoons of butter in a small saucepan until butter is melted and milk is hot, but not boiling.  Keep warm off the heat, covered.  

Drain potatoes well in a sieve or colander and return to hot saucepan.  Add milk mixture, Fontina (or Gruyer) and pepper, and mash with a potato masher or fork to desired consistency.  Season with salt and keep warm, covered.  


Bring a pot of well-salted water to a boil, then add cauliflower and garlic, and simmer until cauliflower is very tender, 13 to 15 minutes.

Drain cauliflower in a colander and pulse with remaining 1/2 cup milk, 1/2 cup Parmigiano-Reggiano, and 3 tablespoons of butter in a food processor until it is chunky puree.  

Stir the mashed potatoes and cauliflower mixture together in a large bowl, and season with salt and pepper.  Transfer to a buttered 3-quart flameproof, shallow baking dish (not glass).

Heat oven to 425 deg. F. with rack in middle.  Melt remaining 2 tablespoons butter, and gently brush over potato-cauliflower mixture, then sprinkle evenly with remaining 1/4 to 1/2 cup Parmigiano-Reggiano (to taste).  Bake until potato mixture bubbles around edges, about 20 minutes.

Turn on broiler and broil 6 to 8 inches from heat, until topping is browned in spots, 1 to 2 minutes.

The cook notes that the potato and cauliflower mixture can be made up to 2 days ahead, before brushing the melted butter and sprinkled cheese over the top.  Bring to room temperature, then bake and broil as directed.  

Recipe can be halved and baked in a 2-quart flameproof shallow baking dish.


It was a wonderful side dish.  The cheese sprinkled on the top turns into a lovely crust and is the yummiest.

As sometimes happens there were a few changes. I forgot to add the garlic when cooking the cauliflower, but it certainly didn't detract from the taste of the dish.  

I missed the part where you put the potatoes back into the oven.  Instead after draining them I tossed them into the mixing bowl of my stand mixer, along with the milk-butter mixture and cheese. I mixed them into a mash, tossed the cooked cauliflower in and combined thoroughly.  The other way there would be more texture to the vegetables, but we enjoyed this creamy mash version.

I also used 1% milk instead of the whole milk, only because it was snowing like the dickens today and didn't feel like driving up to the store in that mess just for milk (that was on January 21st).  I like to use what is in a recipe but after tasting the finished product, I will stick to the 1%. The dish was still very creamy and didn't seem to miss it.

We both loved the combination of mashed potatoes and cauliflower. My Mum used to make something similar when we were kids.  (We have also recently discovered how much we like mashed potatoes with rutabaga.  An equal amount of both veggies, boiled until tender, and mixed with butter (or if you want a lighter version, low-sodium chicken broth, being careful not too add too much liquid that it goes soupy), sour cream, salt and pepper.  

When I make a normal size dish I usually make one to eat that day and one to freeze.  There were also leftovers that only seem to taste better the next day.

I served this with ham and broiled tomatoes but it would be good with any number of dishes, or even on its own for a light supper.  This side dish could be served at any mealtime, and I think it would go great with eggs, mushrooms or a favorite fruit.  
Knowing that many of us globally are still sheltering in place, I will wish you a great week, one that is keeping you happy and healthy.

Here's a smile for you from Ina Garten.
Click here to watch her make a refreshing Cosmopolitan.  Thank you Ina!


Monday, March 16, 2020

MONDAY RECIPE POST - AIR FRYER ROASTED CAULIFLOWER

This Monday's recipe came from All Recipes, made by Bren.  You can look at the original if you click on the link above in red lettering.


Air Fryer Roasted Cauliflower 

Serves:                    2 
Calories:             118 per serving
Preparation time: 10 minutes
Cooking time:      15 minutes
Total time:            25 minutes

3 cloves garlic
1 tablespoon peanut oil
1/2 teaspoon salt
1/2 teaspoon smoked paprika
4 cups cauliflower florets

Preheat an air fryer to 400 degrees F (200 degrees C).

Cut garlic in half and smash with the blade of a knife.  Place in a bowl with oil, salt and paprika.  Add cauliflower and turn to coat.

Place the coated cauliflower in the bowl of the air fryer and cook to desired crispness, about 15 minutes, shaking every 5 minutes.
Our air-fryer is relatively new and I have been experimenting with different things.

This was an very tasty side dish, and would be great for a snack also. 

It took about 10 minutes as they seemed cooked enough, but depends on how well done you like your cauliflower.  This was just past the crisp-tender stage and it does brown very quickly.

I didn't have fresh garlic and instead used garlic powder, 1/2 teaspoon, entirely up to you.

We used avocado oil instead of the peanut oil. 

If I didn't have an air-fryer I would put the oven on at the given temperature (400 deg F), on a foil-lined baking tray, for about 20 minutes.  If you do it this way, don't forget to check it for doneness, and maybe give it a stir half way through the cooking process.  I still like to roast my vegetables in the oven.

It will be fun to try other seasonings, but the smoked paprika and garlic were very nice.

I added half a raw onion cut into chunks, which was left over from another recipe.  We love grilled onions so will use a whole one next time.

Also, I like the idea of using broccoli.

The photo isn't that great and doesn't do it justice but it was so tasty.

That's about all I can think of for now.


Take good care of yourselves out there.  It is a very scary time.  Hugs and love to everyone.


Added note 9-16-20: Valerie from A Mixed Bag asked me about the air-fryer and I thought I would share a photo of ours.  I also found the following information: "An air fryer is a kitchen appliance that cooks by circulating hot air around the food using the convection mechanism.  It is a smaller version of the convection oven."  

My recipes use a minimal amount of oil so it is also healthier than cooking in a deep fryer.  
This is the one I have and what I like is that you can put the basket, and the strainer inside the basket, into the dishwasher.  

I also noticed that the person in the photo is pouring frozen French fries into the basket.  I never thought of using frozen food, and that might be nice if you have a bag of French fries or anything else you want to try in the freezer.


Monday, September 26, 2016

MONDAY RECIPE POST - PALEO CAULIFLOWER MASH


Cauliflower Mash - Paleo - serves 2
by Gus

I found this recipe here.

This is a healthier alternative to Mashed Potatoes, even though we are not on a paleo diet. We love mashed potatoes in our family but on the ever hunt for cooking healthier, we fit things into our menu quite often.  Of course, they have to taste great.  We are kind of picky that way.

Preparation time:  5 minutes
Cooking time:     10 minutes
Total time:           15 minutes  

1 cauliflower, cut into florets
1-4 tablespoons organic coconut oil (can be substituted using butter/ghee)
1 to 2 teaspoons crushed garlic
Salt and Pepper

Steam or boil the cauliflower so that it is tender.  Drain in a colander and place into a food processor with the oil and garlic.  Blend until smooth.

Serve and enjoy!

Guy added the following cooking tips.

"If you want this paleo mashed cauliflower to be super smooth with no lumps at all, then simply push it through a sieve using a spoon.  This may take some time but the end result is a lovely silky smooth cauliflower mash.  If it does end up taking you too long, then be sure to reheat it by placing it back into a pot over low to medium heat.

If you don't have a food blender, then you are still able to mash the cauliflower by hand.  This will take a bit longer and will also be harder to get it nice and smooth.  You can use the tip I mentioned above once you have mashed it to get it to a similar silkiness to the food processor method.

If you are not a fan of garlic make sure you remove it!  The recipe will still taste pretty good without it.  

If you are finding the mash a little too thick for your liking, you can add some almond milk to help thin it out a bit.  I would recommend adding roughly 1/4 cup of almond milk but make sure you slowly add it until you get the consistency you prefer.

If you're interested in other cauliflower dishes, then be sure to check out the super cauliflower rice (found here).  Like this dish the rice is fantastic as either a side dish or to go alongside a protein or similar in a meal."


What did we think?  This turned out a truly delicious side dish.  Tell you the truth we were both surprised how much we enjoyed it.  We like cauliflower a lot but normally have had it steamed in florets, or with cheese sauce as in cauliflower cheese.   It is a keeper and we will be making it again.

Mine came out thinner than I expected and that's probably the way it should be as it is a lot lighter in every way than potatoes.  I actually used two heads of cauliflower as I wanted leftovers to heat up the next day and only used four tablespoons of butter, but I may try cutting down on the amount, which was what I used instead of the coconut oil (I didn't have in my pantry supplies. It will go on the shopping list).  Gregg just said he enjoyed it very much and not to mess around with the ingredients.  He loved it as is.  And there are leftovers for tomorrow.

The photos show it sprinkled liberally with freshly ground black pepper. 

If you are following a Paleo diet here is what I read online.

"Still others say that specifically butter can be part of the Paleo diet, because it differs from other milk products, specifically low fat or skim milk products, in that its higher fat content could potentially lower the glycemic load.   They recommend using only grass fed butter which has then been clarified."